ONE COLOUR SHADOW ILLUSION CROCHET
Some while back, I released a pattern for this guitar afghan.
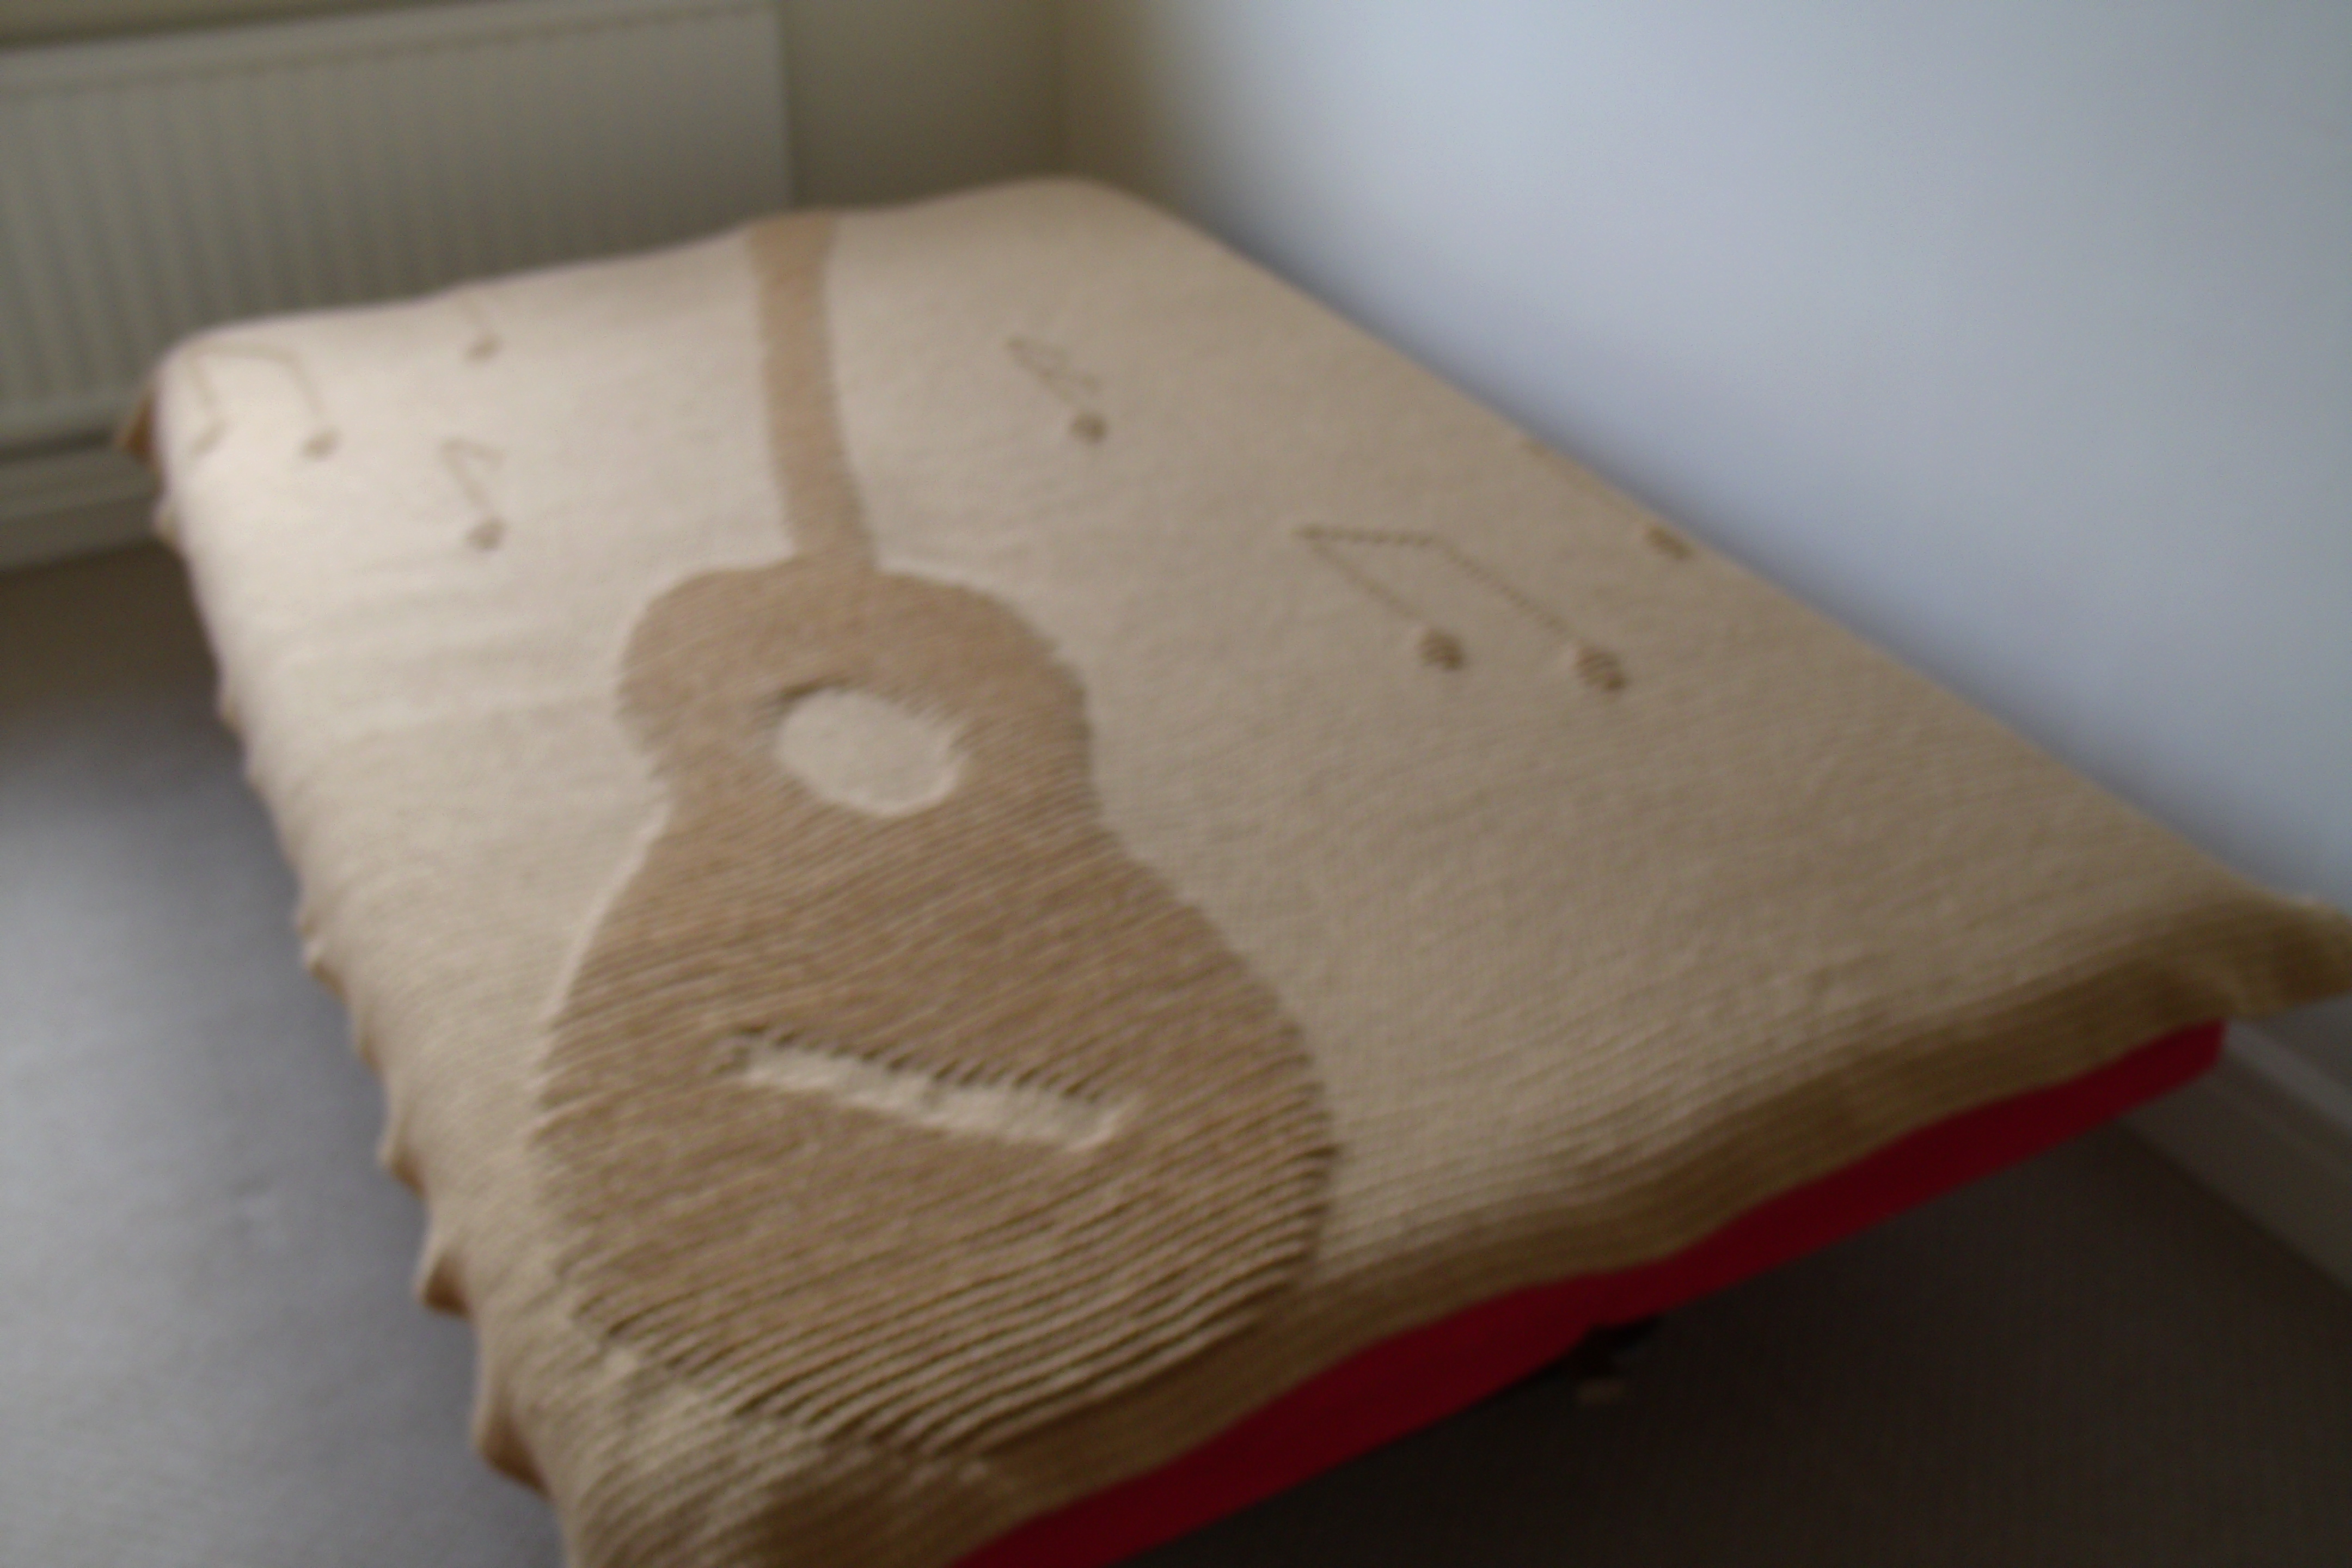
Since then, many people have asked me how it’s worked and how the chart was created. Hopefully, this will answer both those questions.
Creating the pattern
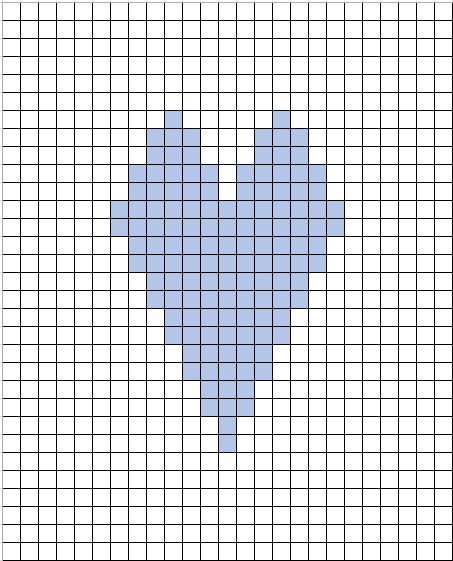
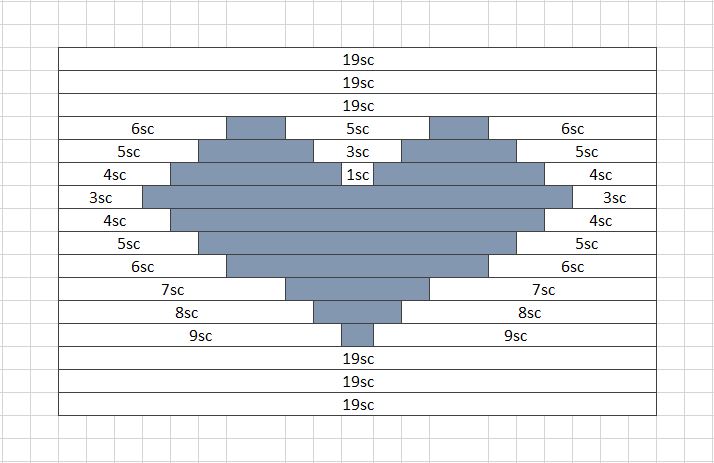
Begin by creating a chart for your design – I will use a heart as an example. You can use graph paper but the process is much quicker using spreadsheet software (MS Excel or Google Spreadsheets are perfect)
When crocheting later, each ‘shadow’ requires two rows. For that reason, it is best to repeat each row twice when planning your design. This will ensure a good representation of the designed shape in the final item.
To make it easier to work with the chart, now that we have designed our image, we can remove the duplicate rows and make the picture squishy!
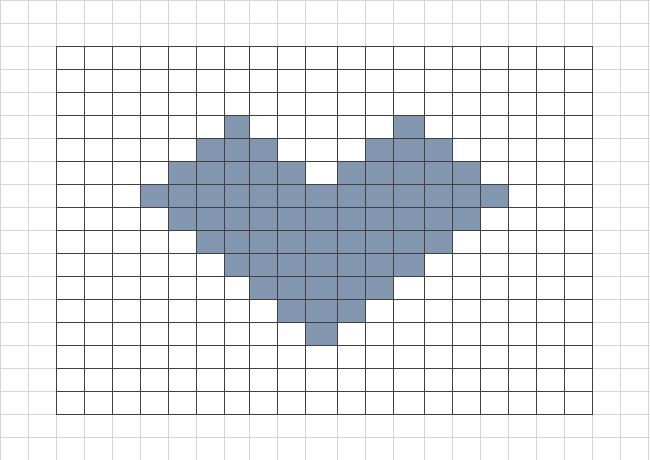
The next step is to work along each row, merging cells of the same colour.

Working row by row, count each of the white spaces and label them as sc (single crochet).
Still working row by row, count each of the coloured spaces and label them as FLhdc – this is simply a half double crochet worked in the free loop (more about this later).
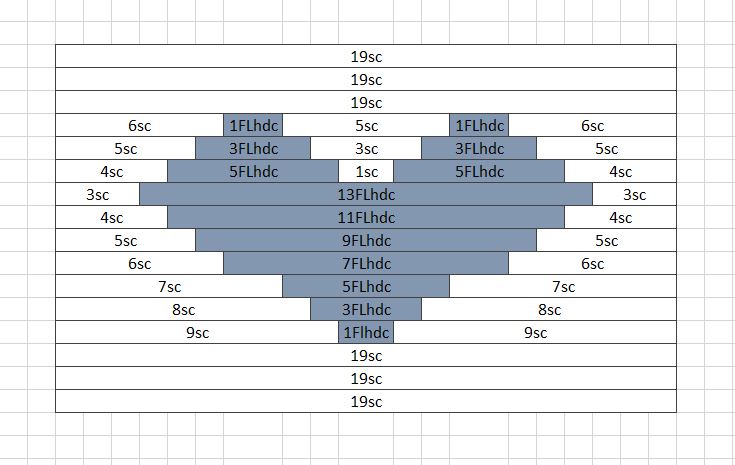
Do not be alarmed by the distorted shape. The squares have just been expanded so that you can see the writing clearly.
You now have the odd numbered rows designed. The next step is to translate this into a written form and add the even numbered rows. For a small chart (as per this example, this is easy enough to type out manually). However, there is an automated method which can save hours of time on a large chart.
Note: If doing this manually, you need to write each row, from the top to the bottom.
- Highlight the chart area and copy
- Into a blank document (Word or similar) click Paste Special and keep text only.
- Using find and replace, enter ^w in the find box and a comma and a space in the replace box, then click replace all.
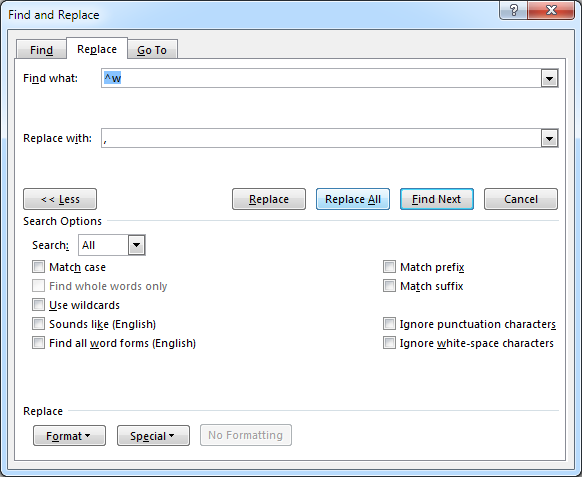
Note: If using Google Docs, you can leave the find box empty.
The resulting text should now look like this:
19sc,
19sc,
19sc,
6sc, 1FLhdc, 5sc, 1FLhdc, 6sc,
5sc, 3FLhdc, 3sc, 3FLhdc, 5sc,
4sc, 5FLhdc, 1sc, 5FLhdc, 4sc,
3sc, 13FLhdc, 3sc,
4sc, 11FLhdc, 4sc,
5sc, 9FLhdc, 5sc,
6sc, 7FLhdc, 6sc,
7sc, 5FLhdc, 7sc,
8sc, 3FLhdc, 8sc,
9sc, 1Flhdc, 9sc,
19sc,
19sc,
19sc,
Warning! The next step is the most tedious of the whole process :O
We need to precede each row with the reverse of the next replacing each FLhdc with BLsc.
BLsc is simply a single crochet worked in the back loop of the stitch (as with the FLsc, we will look at this in more detail later). In the case of a symmetrical pattern such as this, our job is a lot easier.
We now have text that looks like this.
19sc,
19sc
19sc,
19sc,
19sc,
19sc,
6sc, 1BLsc, 5sc, 1BLsc, 6sc,
6sc, 1FLhdc, 5sc, 1FLhdc, 6sc,
5sc, 3BLsc, 3sc, 3BLsc, 5sc,
5sc, 3FLhdc, 3sc, 3FLhdc, 5sc,
4sc, 5BLsc, 1sc, 5BLsc, 4sc,
4sc, 5FLhdc, 1sc, 5FLhdc, 4sc,
3sc, 13BLsc, 3sc,
3sc, 13FLhdc, 3sc,
4sc, 11BLsc, 4sc,
4sc, 11FLhdc, 4sc,
5sc, 9BLsc, 5sc,
5sc, 9FLhdc, 5sc,
6sc, 7BLsc, 6sc,
6sc, 7FLhdc, 6sc,
7sc, 5BLsc, 7sc,
7sc, 5FLhdc, 7sc,
8sc, 3BLsc, 8sc,
8sc, 3FLhdc, 8sc,
9sc, 1BLsc, 9sc,
9sc, 1Flhdc, 9sc,
19sc,
19sc,
19sc,
19sc,
19sc,
19sc,
Our final task is to add row numbers, a turn at the end of each row and get on with the fun bit of working the pattern. Oh, and, since our piece is 19sc wide, we need to start with 20 chain and we will begin by working our first sc in the second of these chain.
Pattern
Commence with 20ch.
Row 1: (Starting in 2nd ch from hook) 19sc, turn.
Row 2: 19sc, turn.
Row 3: 19sc, turn.
Row 4: 19sc, turn.
Row 5: 19sc, turn.
Row 6: 19sc, turn.
Row 7: 6sc, 1BLsc, 5sc, 1BLsc, 6sc, turn.
Row 8: 6sc, 1FLhdc, 5sc, 1FLhdc, 6sc, turn.
Row 9: 5sc, 3BLsc, 3sc, 3BLsc, 5sc, turn.
Row 10: 5sc, 3FLhdc, 3sc, 3FLhdc, 5sc, turn.
Row 11: 4sc, 5BLsc, 1sc, 5BLsc, 4sc, turn.
Row 12: 4sc, 5FLhdc, 1sc, 5FLhdc, 4sc, turn.
Row 13: 3sc, 13BLsc, 3sc, turn.
Row 14: 3sc, 13FLhdc, 3sc, turn.
Row 15: 4sc, 11BLsc, 4sc, turn.
Row 16: 4sc, 11FLhdc, 4sc, turn.
Row 17: 5sc, 9BLsc, 5sc, turn.
Row 18: 5sc, 9FLhdc, 5sc, turn.
Row 19: 6sc, 7BLsc, 6sc, turn.
Row 20: 6sc, 7FLhdc, 6sc, turn.
Row 21: 7sc, 5BLsc, 7sc, turn.
Row 22: 7sc, 5FLhdc, 7sc, turn.
Row 23: 8sc, 3BLsc, 8sc, turn.
Row 24: 8sc, 3FLhdc, 8sc, turn.
Row 25: 9sc, 1BLsc, 9sc, turn.
Row 26: 9sc, 1Flhdc, 9sc, turn.
Row 27: 19sc, turn.
Row 28: 19sc, turn.
Row 29: 19sc, turn.
Row 30: 19sc, turn.
Row 31: 19sc, turn.
Row 32: 19sc, turn.
Reading the pattern
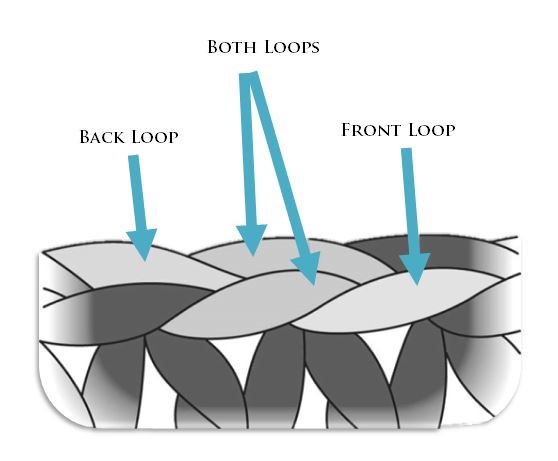
So, now we come to the practical bit -how to work the stitches. As you probably know crochet stitches, can be viewed as back loops, front loops and both loops.
For this pattern to work, the stitches are worked as you would normally work them, other than this placement.
- All single crochet (sc) are worked in both loops
- All back loop single crochet (BLsc) are worked in the back loop only
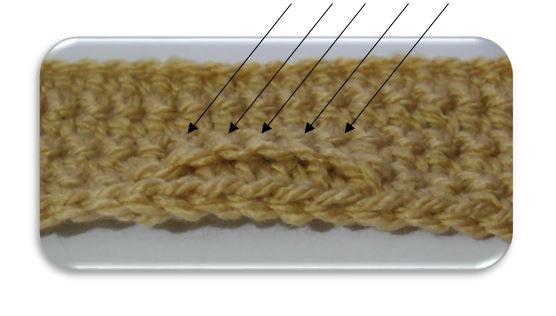
- All front loop half double crochet (FLhdc) are worked in the free loops only
So, “What are the free loops?” I hear you ask. This becomes more apparent when you begin working but, it will be the unused loops in the previous row that lay behind the stitches like this:
So there it is. You can now create a chart for any one coloured shadow crochet piece. And, the result…..the most amazing textured item that you can use in so many ways.
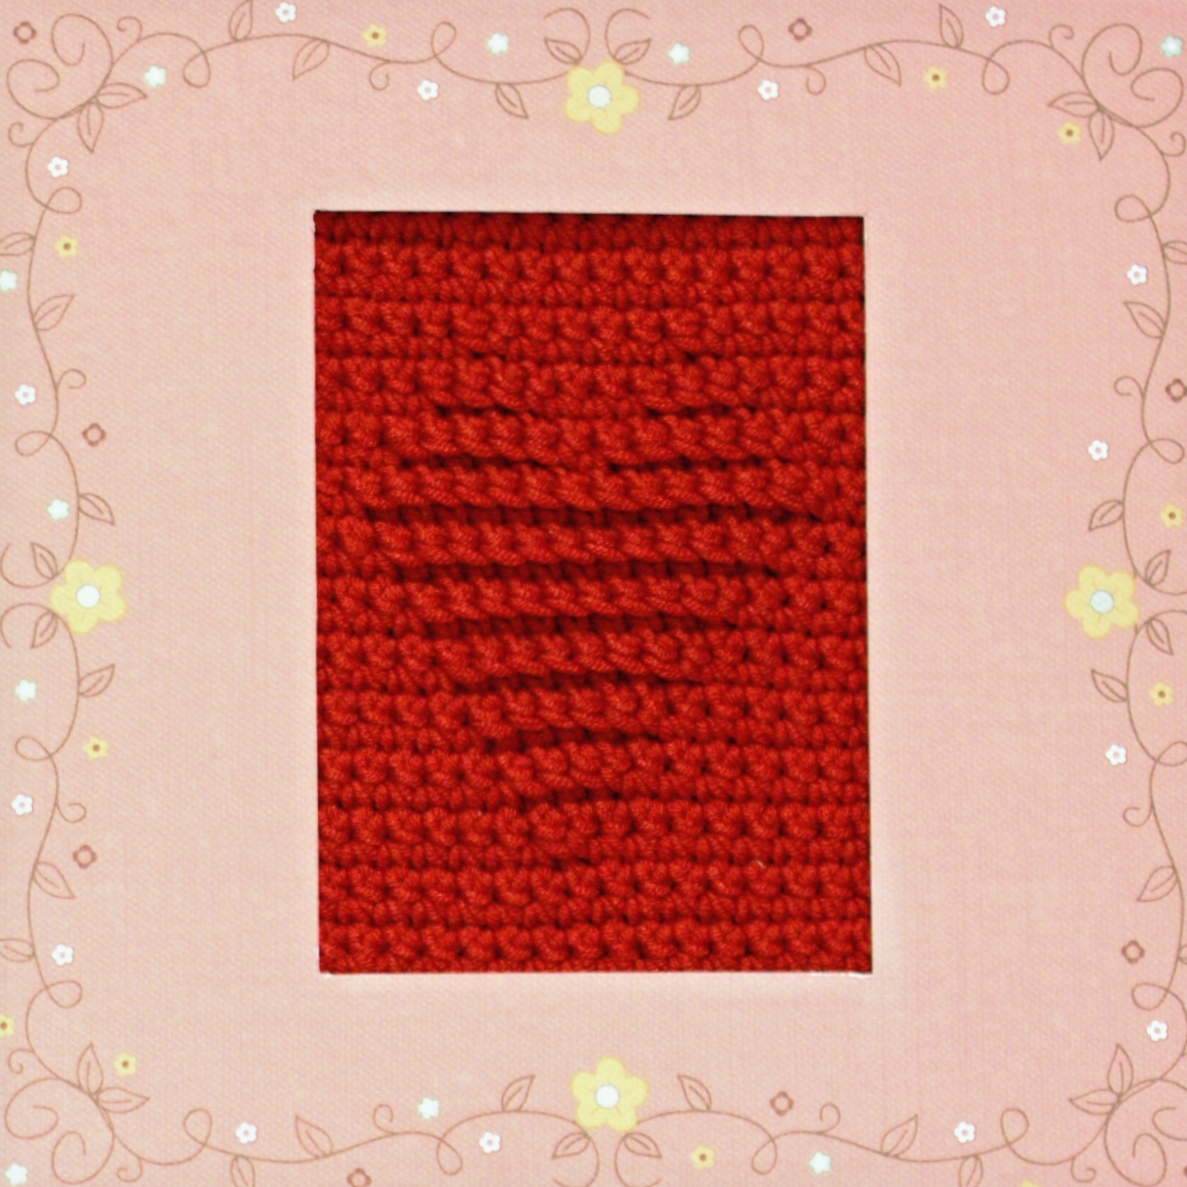
I hope you enjoyed seeing how the guitar afghan was created. Perhaps after making this, you will be confident enough to experiment with your own designs.
Copyright Thomasina Cummings Designs 2014, All Rights Reserved