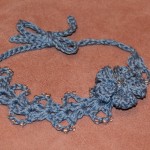
Category Archives: Free Patterns

Crochet Flower Hat

Download for free now

Flower Hat

Turn your baby into a gorgeous little flower for a photo shoot. This oh-so-sweet flower hat is generously sized to fit a whole range of babies from 0-3 months.

Materials: Approximately 75g of double knit (8 ply) main colour and 25g of double knit (8ply) contrast colour.

Tools: 3.50mm (E) hook and a wool needle for finishing.

Gauge: 4 stitches and 3 rows = 2.5cm/1” (trebles).

Pattern written in UK terms with US equivalents provided where applicable.

Crochet Pebbles in Progress

I’ve been busy re-decorating for a while now and my crochet has been sadly neglected. But, my new project combines both decorating and crochet so I’m a happy hooker again!

Introducing the oh-so-simple Crochet Pebbles Rug.

Here’s my Work In Progress picture so you can get an idea of what I mean :)

Crochet Pebbles

I’m using an an IKEA rug (which costs around £1.20).  The idea being that I won’t have to back the pebbles with a non-slip coating to make it safer to use.

There are 5 different sizes of crochet pebbles (crochet instruction below in UK terms) and I’m using 5 different shades of DROPS Safran Combed Cotton 4 ply yarn.

Pebbles 1 to 5

I’m about half way through making the crochet pebbles so I should be ready to glue them all into place by the weekend (time permitting) :)

If you fancy having a go at this really simple project, download the crochet instructions PDF for each of the pebbles.  It’s in UK terms so bear this in mind when you are working it :)

Pebble Rug

I’d love to hear what you think and, if you give it a go, please do pop over to my Facebook page to share your pictures.

Happy Valentine’s Day!!!

Hi Everyone – Happy Valentine’s Day ♥ ♥ ♥

Yes, I know I’m a bit early but, I have a little present for you.  Plus I figured, if you’re going to make this by Valentine’s Day, I’d better get it to you with time to spare ;)

So, without further ado,

Roses are Red
Violets are Blue
Here’s My Valentine’s Cowl for you!!

Valentine's Day Free Crochet Cowl Pattern

My Valentine’s Cowl uses DK yarn (less than 300 m) and is created with front and back post stitches for fabulous snug thickness and texture.  You can make it deeper or, with a little bit of planning, adjust the width to work with other yarns.  If you have any trouble working this out, just give me a shout.

The pattern is fully written in both UK and US terms with a little chart for reference purposes.

I hope you like it ♥

PS Just in case I haven’t got the hang of this flip-book thingamajig, here’s the link to download the pattern for free on Ravelry

Lock For Lovespoon UK

Lock For Lovespoon (as seen on right hand spoon)

Lovespoon with Lock

This lock is designed to go with the Lovespoon Pattern which you can find here.  The lock symbolises security and looking after each other.

YOU WILL NEED around 20 m DK yarn, an appropriate sized hook, a stitch marker and a needle for weaving in ends.  You will also need some offcuts of yarn to stuff the lock.

GAUGE is variable depending on yarn chosen – you should select a similar yarn to that used for the spoon.  If you aim for 4sts and 4 rows of UK dc to 2.5 cm (1”) you should achieve a lock of approximately 5 cm (2″) length and 2.5 cm (1″) width.

ABBREVIATIONS

This pattern is written in UK terms.  The US version is available here.

ch – chain
dc – double crochet
st(s) – stitch(es)
rnd – round
ss – slip stitch

Lock Base

Commence, at base, with a foundation of 6ch.

Rnd 1:        3dc into 2nd ch from hook, 1dc in each of next 3ch, 3dc in final ch, rotate, 1dc in each of the 3 un-worked loops of foundation ch, ss to first dc to join – 12sts.

Rnd 2:        1ch, 1dc in back loop of each st around, do not join – 12sts.
Rnd 3:        1dc in each st around – 12sts.
Rnd 4:        1dc in each st around – 12sts.

Work 1dc in next st, ss in next st and fasten off.  Stuff gently with a little matching yarn and close the opening (retaining the shape).  Neaten ends.

Proceed to Lock Hanger.

Lock Hanger

Commence with a foundation of 11ch.

Row 1:        (Starting in 2nd ch from hook) ss in each ch to end, turn – 10sts.
Row 2:        1ch (pulled tightly), ss in back loop of each st to end, turn – 10sts.
Row 3:       1ch (pulled tightly), ss in front loop of each st to end, turn – 10sts.

Fasten off leaving a 30 cm (12”) tail.  Bring last row and foundation ch together.  Close by stitching though both back loops and corresponding foundation ch from one end to the other.

Stitch one end to the top of the lock at one outer edge.  Weave the tail through the top of the Lock Base to the other end.  Pass the handle around the lower right tail of the handle, just above the spoon bowl and stitch firmly to the other outer edge.

If desired you may embroider a keyhole in black yarn.

Lock Close Up


Lock For Lovespoon US

Lock For Lovespoon (as seen on right hand spoon)

Lovespoon with Lock

This lock is designed to go with the Lovespoon Pattern which you can find here.  The lock symbolizes security and looking after each other.

YOU WILL NEED around 20 m DK yarn, an appropriate sized hook, a stitch marker and a needle for weaving in ends.  You will also need some offcuts of yarn to stuff the lock.

GAUGE is variable depending on yarn chosen – you should select a similar yarn to that used for the spoon.  If you aim for 4sts and 4 rows of UK dc to 2.5 cm (1”) you should achieve a lock of approximately 5 cm (2″) length and 2.5 cm (1″) width.

ABBREVIATIONS

This pattern is written in US terms. The UK version is available here.

ch – chain
sc – single crochet
st(s) – stitch(es)
rnd – round
sl st – slip stitch

Lock Base

Commence, at base, with a foundation of 6ch.

Rnd 1:        3sc into 2nd ch from hook, 1sc in each of next 3ch, 3sc in final ch, rotate, 1sc in each of the 3 un-worked loops of foundation ch, sl st to first sc to join – 12sts.

Rnd 2:        1ch, 1sc in back loop of each st around, do not join – 12sts.
Rnd 3:        1sc in each st around – 12sts.
Rnd 4:        1sc in each st around – 12sts.

Work 1sc in next st, sl st in next st and fasten off.  Stuff gently with a little matching yarn and close the opening (retaining the shape).  Neaten ends.

Proceed to Lock Hanger.

Lock Hanger

Commence with a foundation of 11ch.

Row 1:        (Starting in 2nd ch from hook) sl st in each ch to end, turn – 10sts.
Row 2:        1ch (pulled tightly), sl st in back loop of each st to end, turn – 10sts.
Row 3:       1ch (pulled tightly), sl st in front loop of each st to end, turn – 10sts.

Fasten off leaving a 30 cm (12”) tail.  Bring last row and foundation ch together.  Close by stitching though both back loops and corresponding foundation ch from one end to the other.

Stitch one end to the top of the lock at one outer edge.  Weave the tail through the top of the Lock Base to the other end.  Pass the handle around the lower right tail of the handle, just above the spoon bowl and stitch firmly to the other outer edge.

If desired you may embroider a keyhole in black yarn.

Lock Close Up


Milestone Madness Giveaway

Come celebrate the Milestone Madness!!!

The owners of Bowtykes, Forever Stitchin, VIP Handmade Creations, Kaleidoscope Art&Gifts, Creative Hats and More, Smalltown Dreamz, AllieCat’s Hats and Crafts, Hannahs Homestead, Knotted Notions, Gramma Bean’s Homemade Gifts, and BrandyLynn Creations are all celebrating a Facebook milestone.

Together they will be giving away free crochet patterns and other crafts, as will many of their friends (me included)!


Look around and find creative new pages to follow and fun crafts to work on! The Milestone Madness and More Giveaway runs from July 7 to July 13 at midnight PST.

Enter NOW!

Rafflecopter now closed!

Could you earn yourself a refund?

If you are a photographer, prop supplier or crafter you could earn yourself a refund on all prop patterns purchased from Thomasina Cummings Designs.

To apply, send the following to admin@thomasinacummings.co.uk

  1. A professional quality, watermarked photograph, featuring one of my designs in use – you are welcome to make it un-usable by some method, pre agreement of use, if you are happier this way.
  2. A statement that I have full release to use the photograph to advertise my patterns on Facebook, in any of my stores, in my patterns and/or on any website owned/co-owned or run by Thomasina Cummings Designs.
  3. PayPal transaction ID or some other means of verifying your purchase.

If I think I can make use of the picture, I will contact you and arrange a refund you the price paid.  It’s as simple as that!

If, for any reason, I can’t make use of the photograph, I will let you know.  Please don’t feel disheartened if this happens – it may be that I simply have too many shots of that item already, or that it doesn’t focus on a particular feature of the pattern that I need to show.

Why not give it a try – you have nothing to lose and a refund to gain!

FREE Princess Headband Tutorial

PRINCESS HEADBAND

To fit newborn (14-16″) – tie length adjustable if desired.

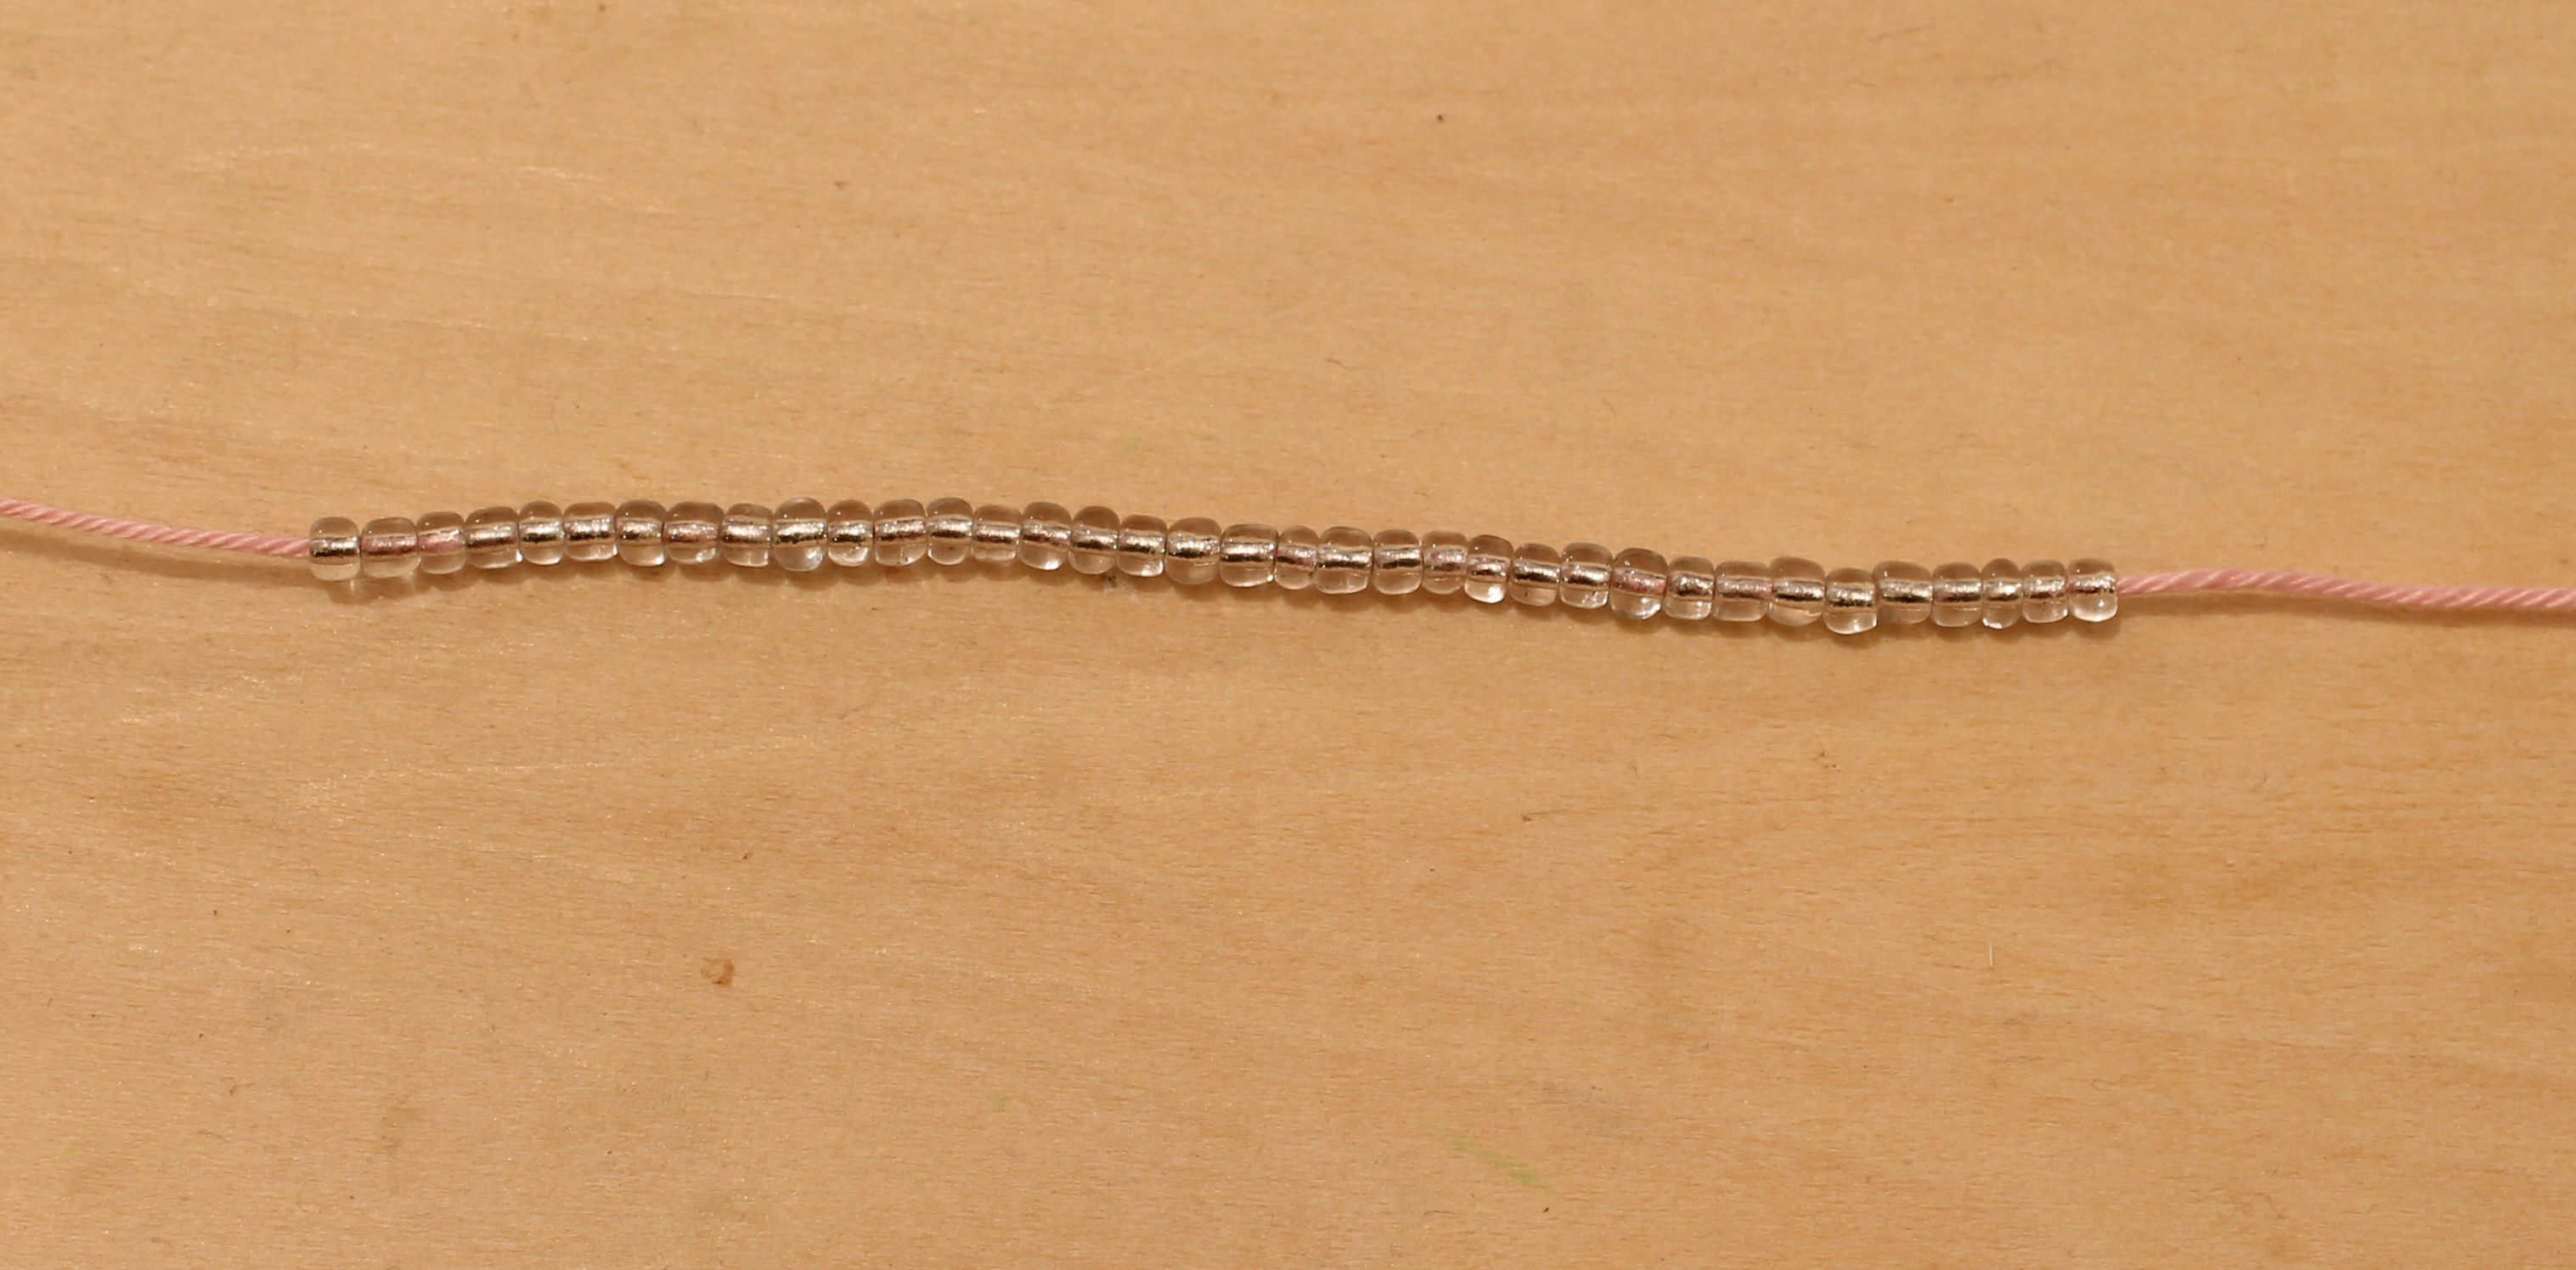
You will need around 30 m cotton yarn in double knit/light worsted weight thickness, a 3.50 mm hook, 41 mini beads and a needle for neatening ends.

042

Pattern/tutorial uses UK terms throughout.

ABBREVIATIONS

ch – chain
dc – double crochet (US single crochet)
htr – half treble (US half double crochet)
rep – repeat
RS – right side
sp – space
ss – slip stitch
tr – treble (US double crochet)

SPECIAL STITCHES/METHODS

Threading beads:  Dip the end of the yarn in PVA/white glue, twist in the natural direction as the plies and leave to dry before threading.

Picot:  2ch, ss in 2nd ch from hook – chains for picot will be in addition to any ch already made.

PATTERN

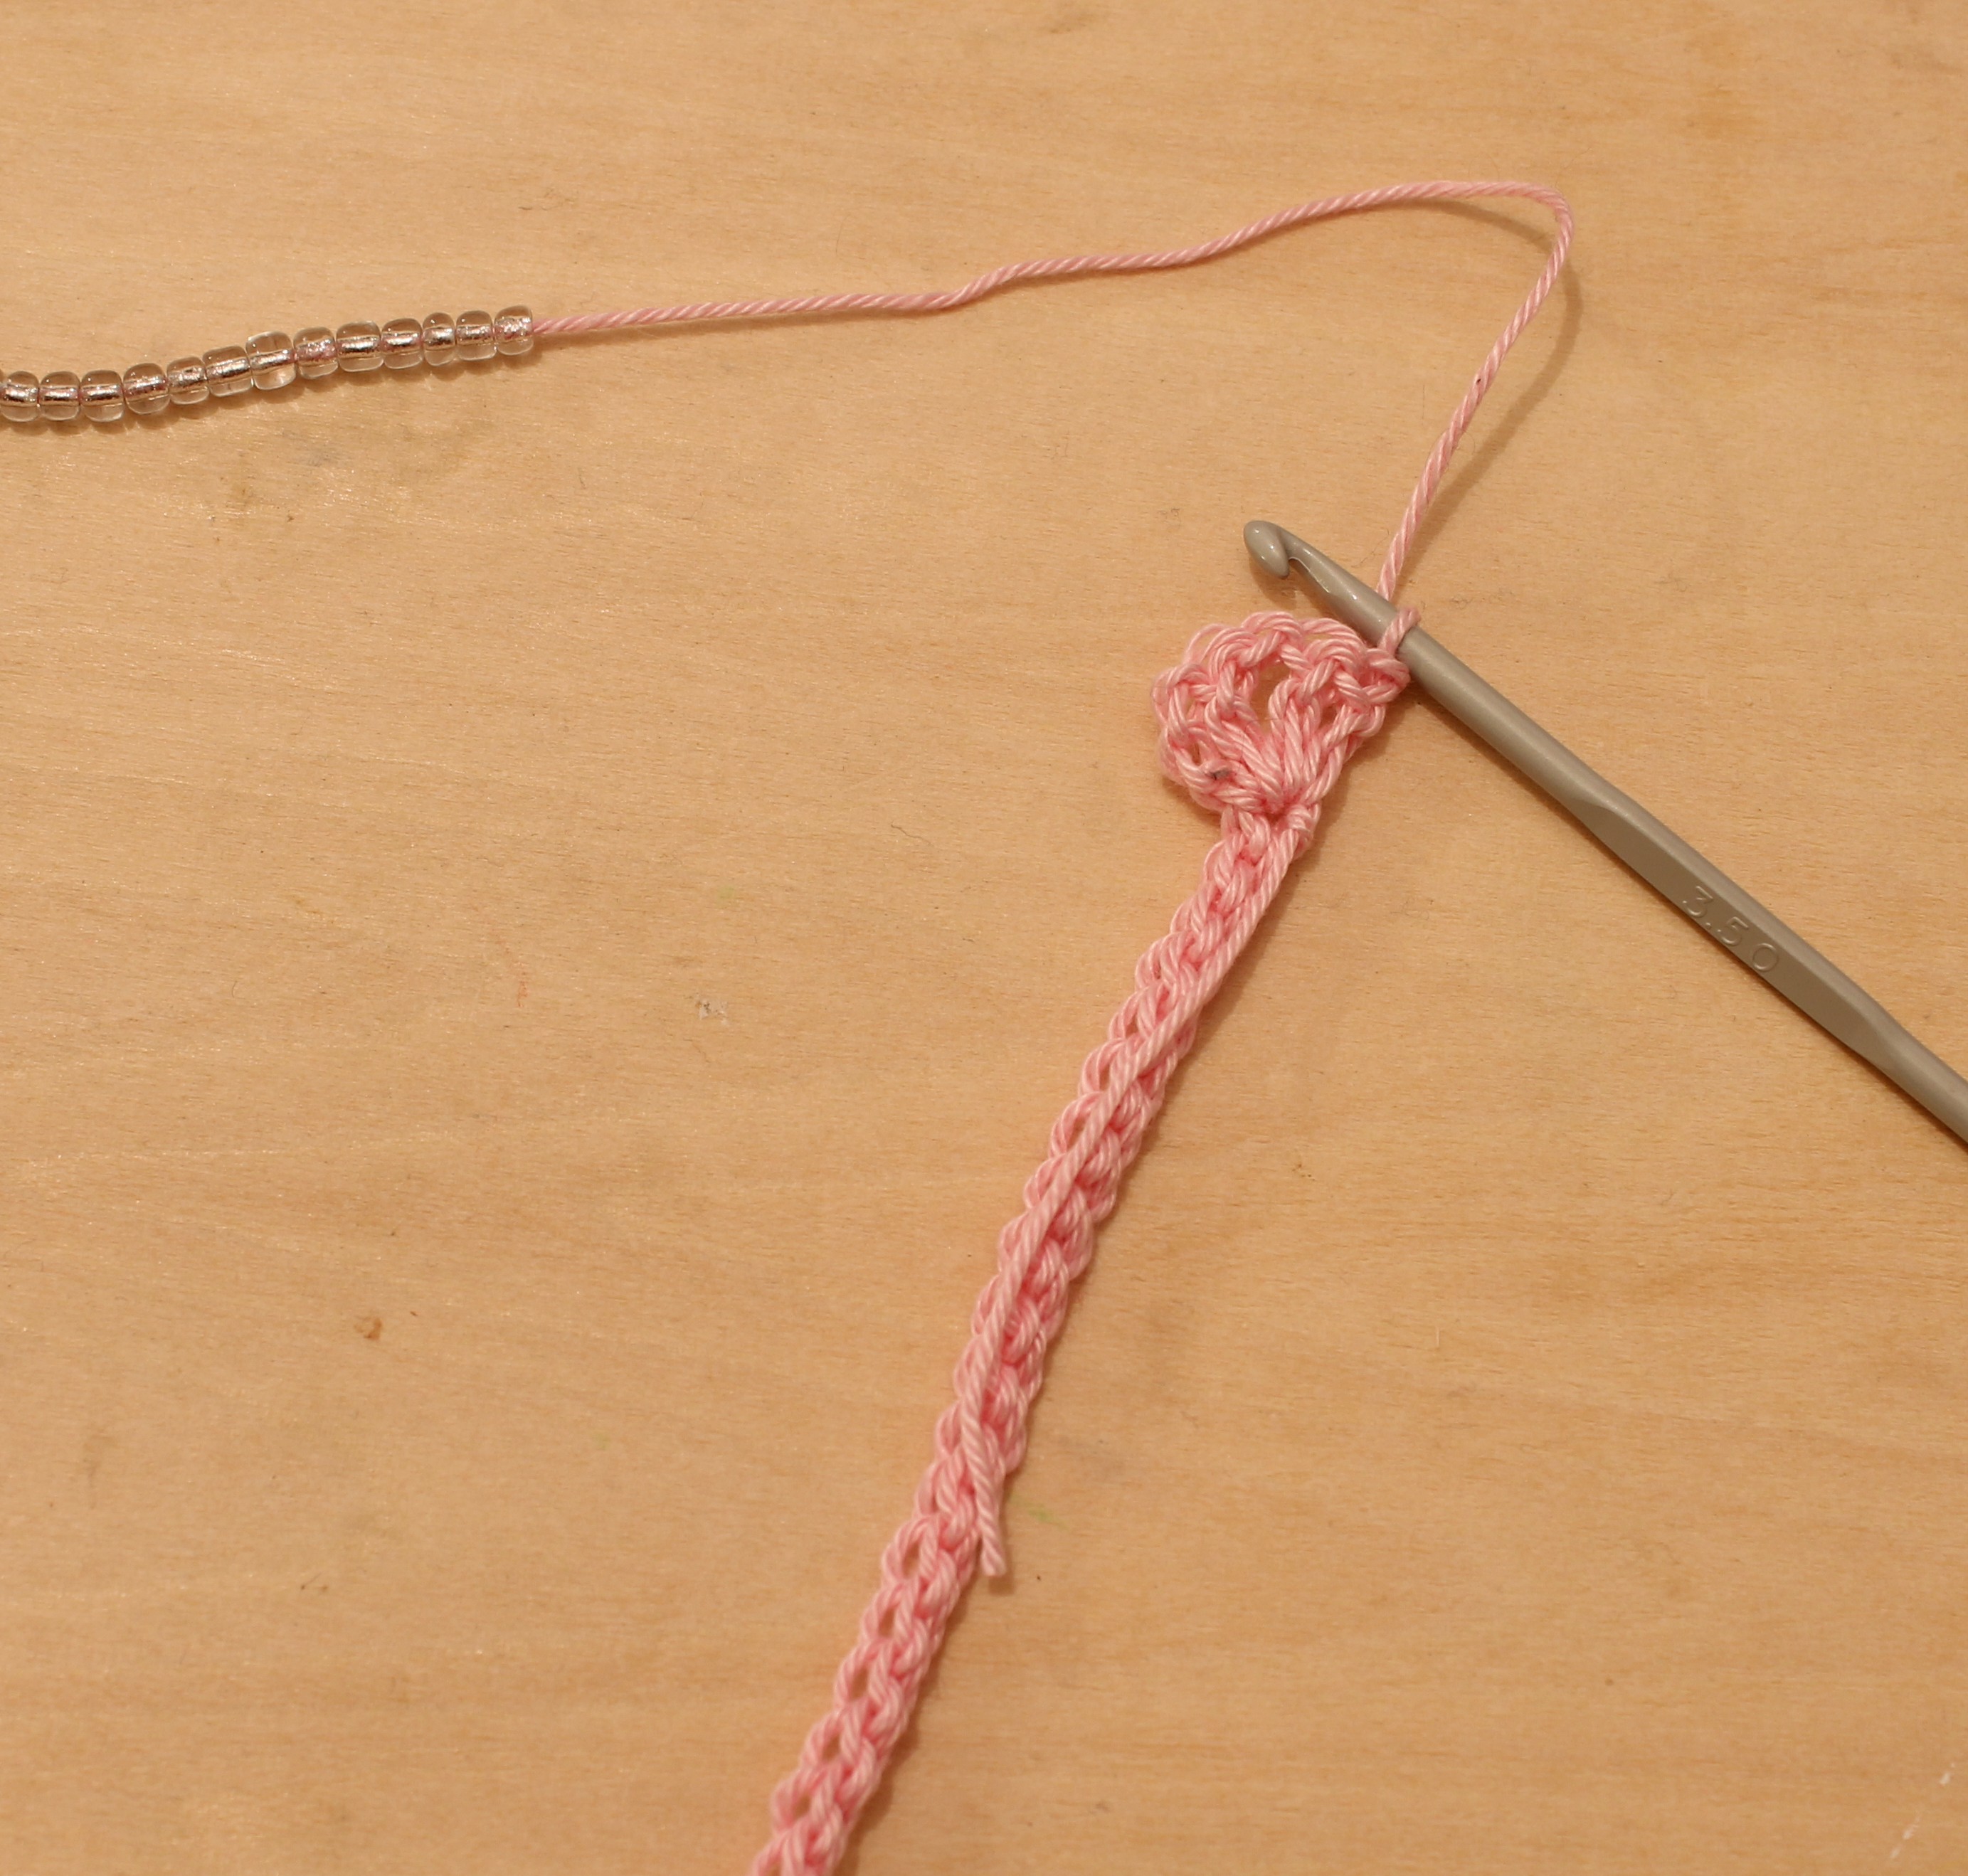
Thread 36 beads onto yarn.

030

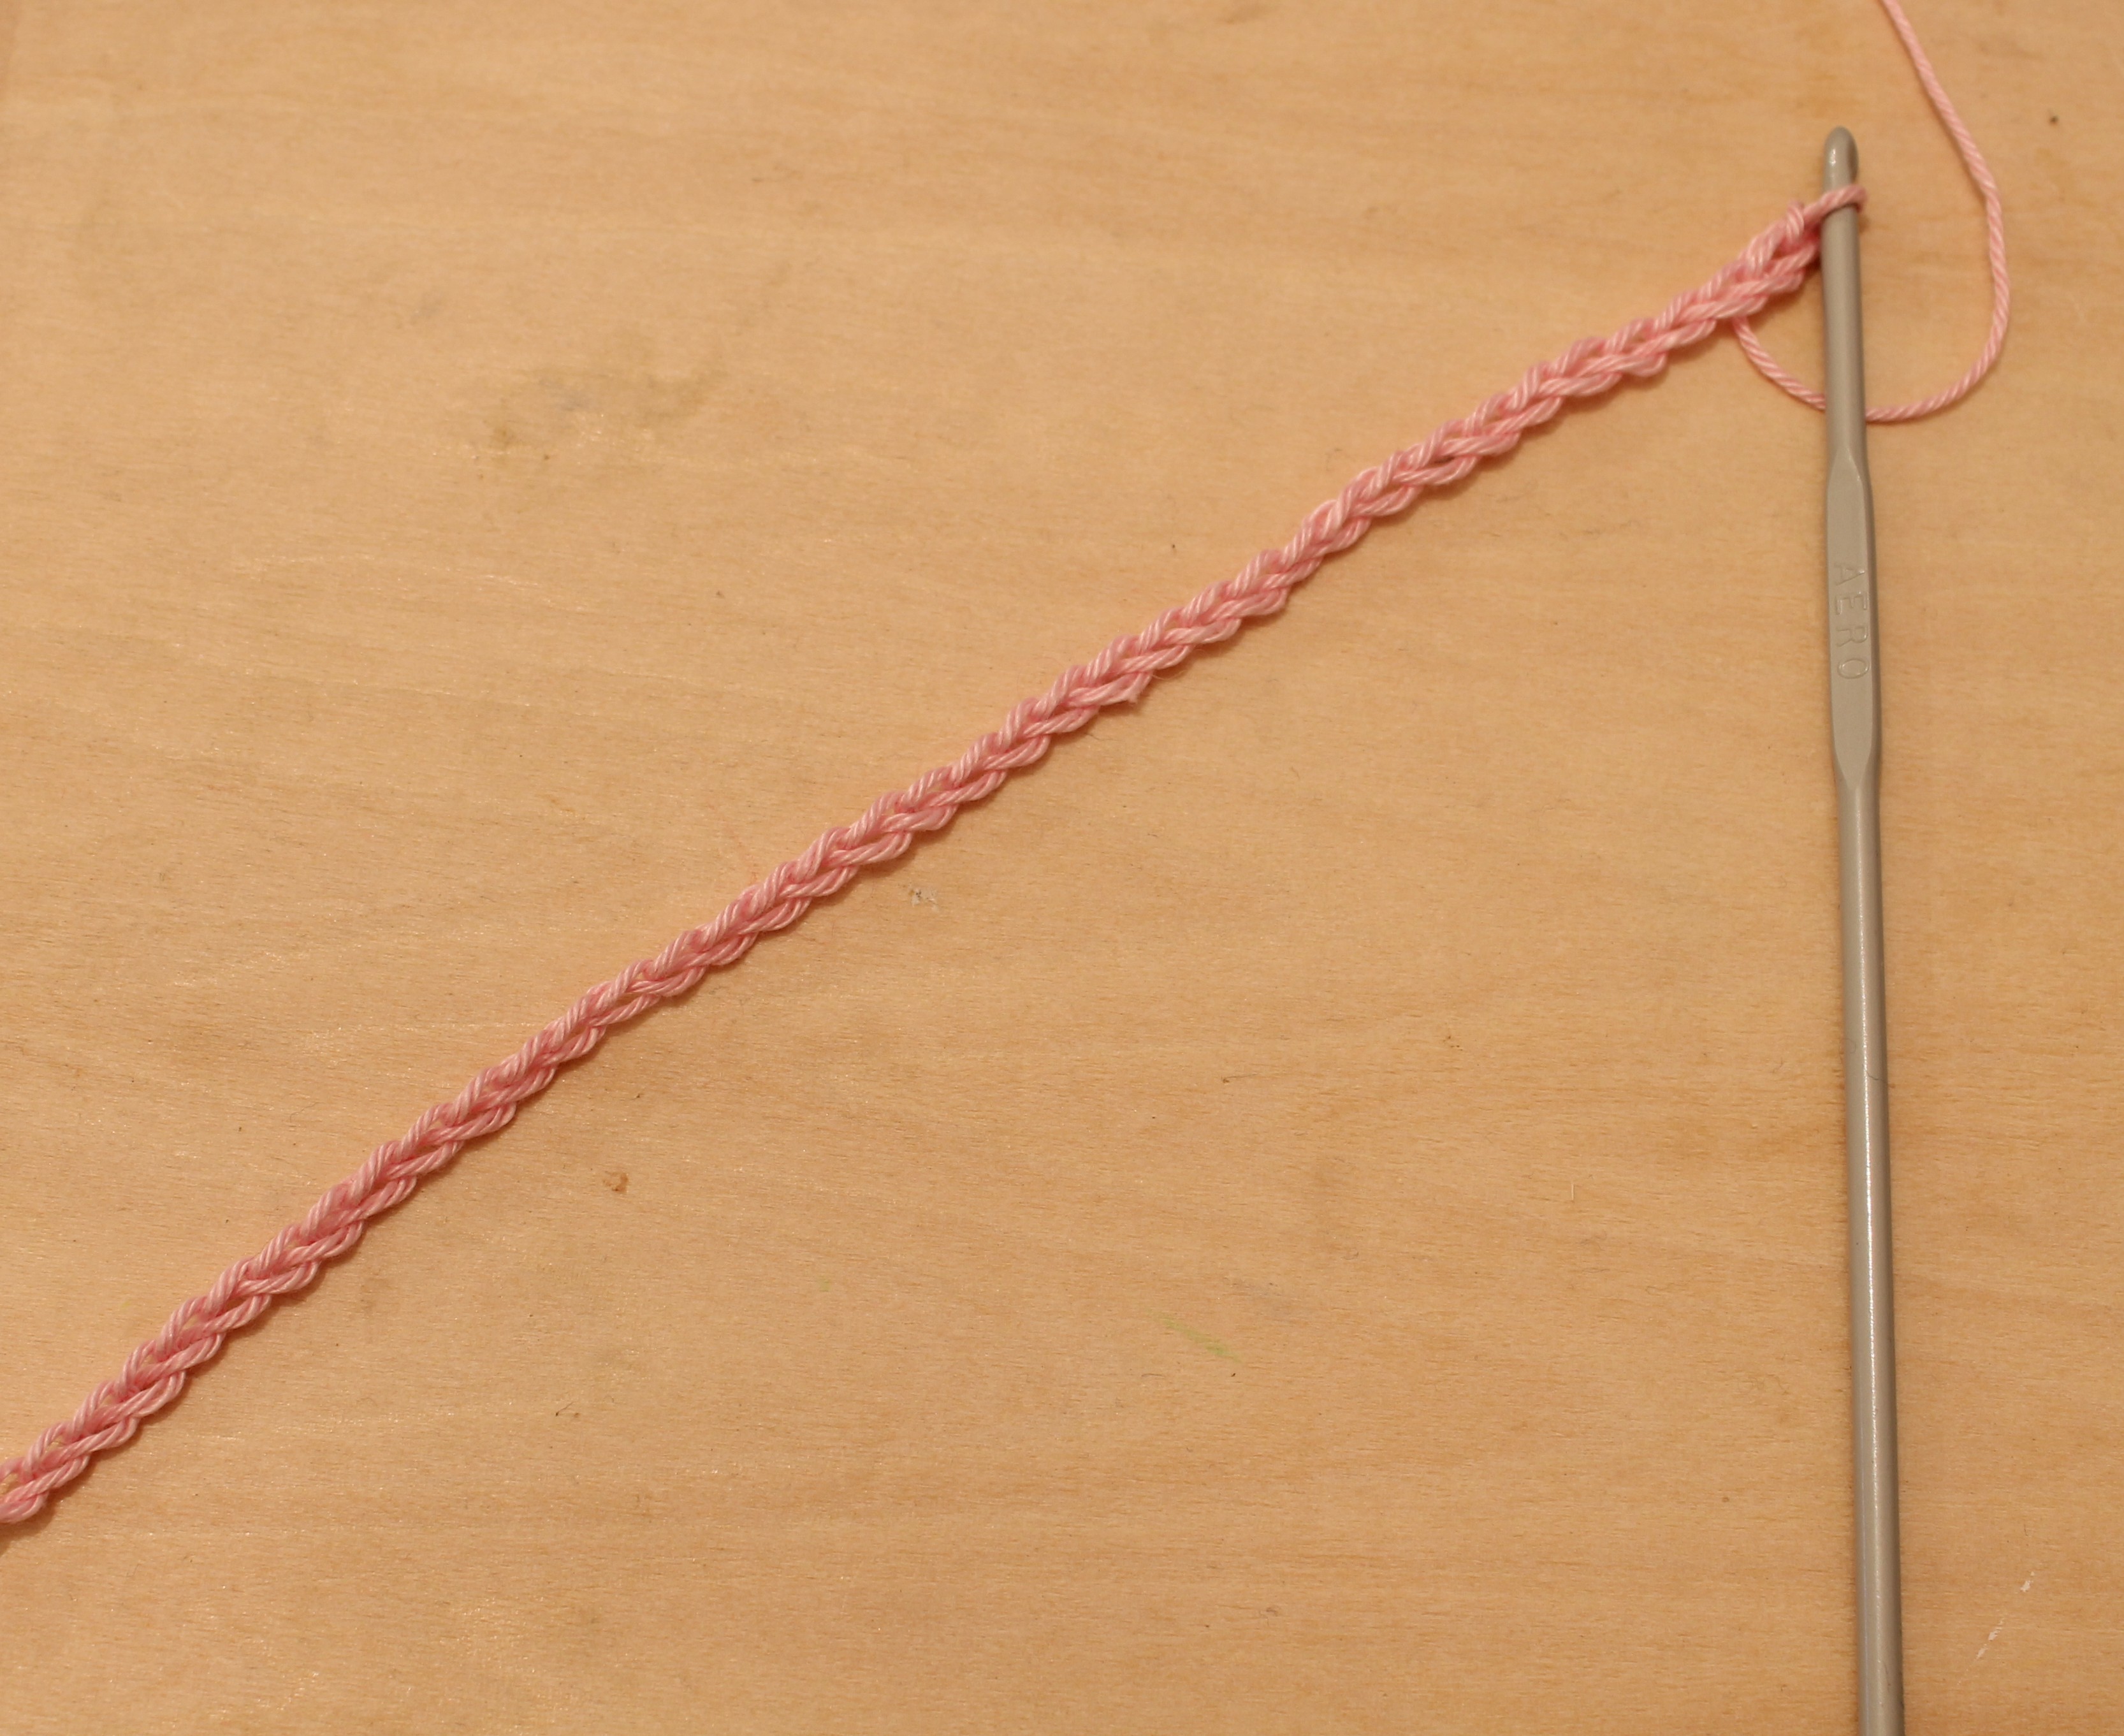
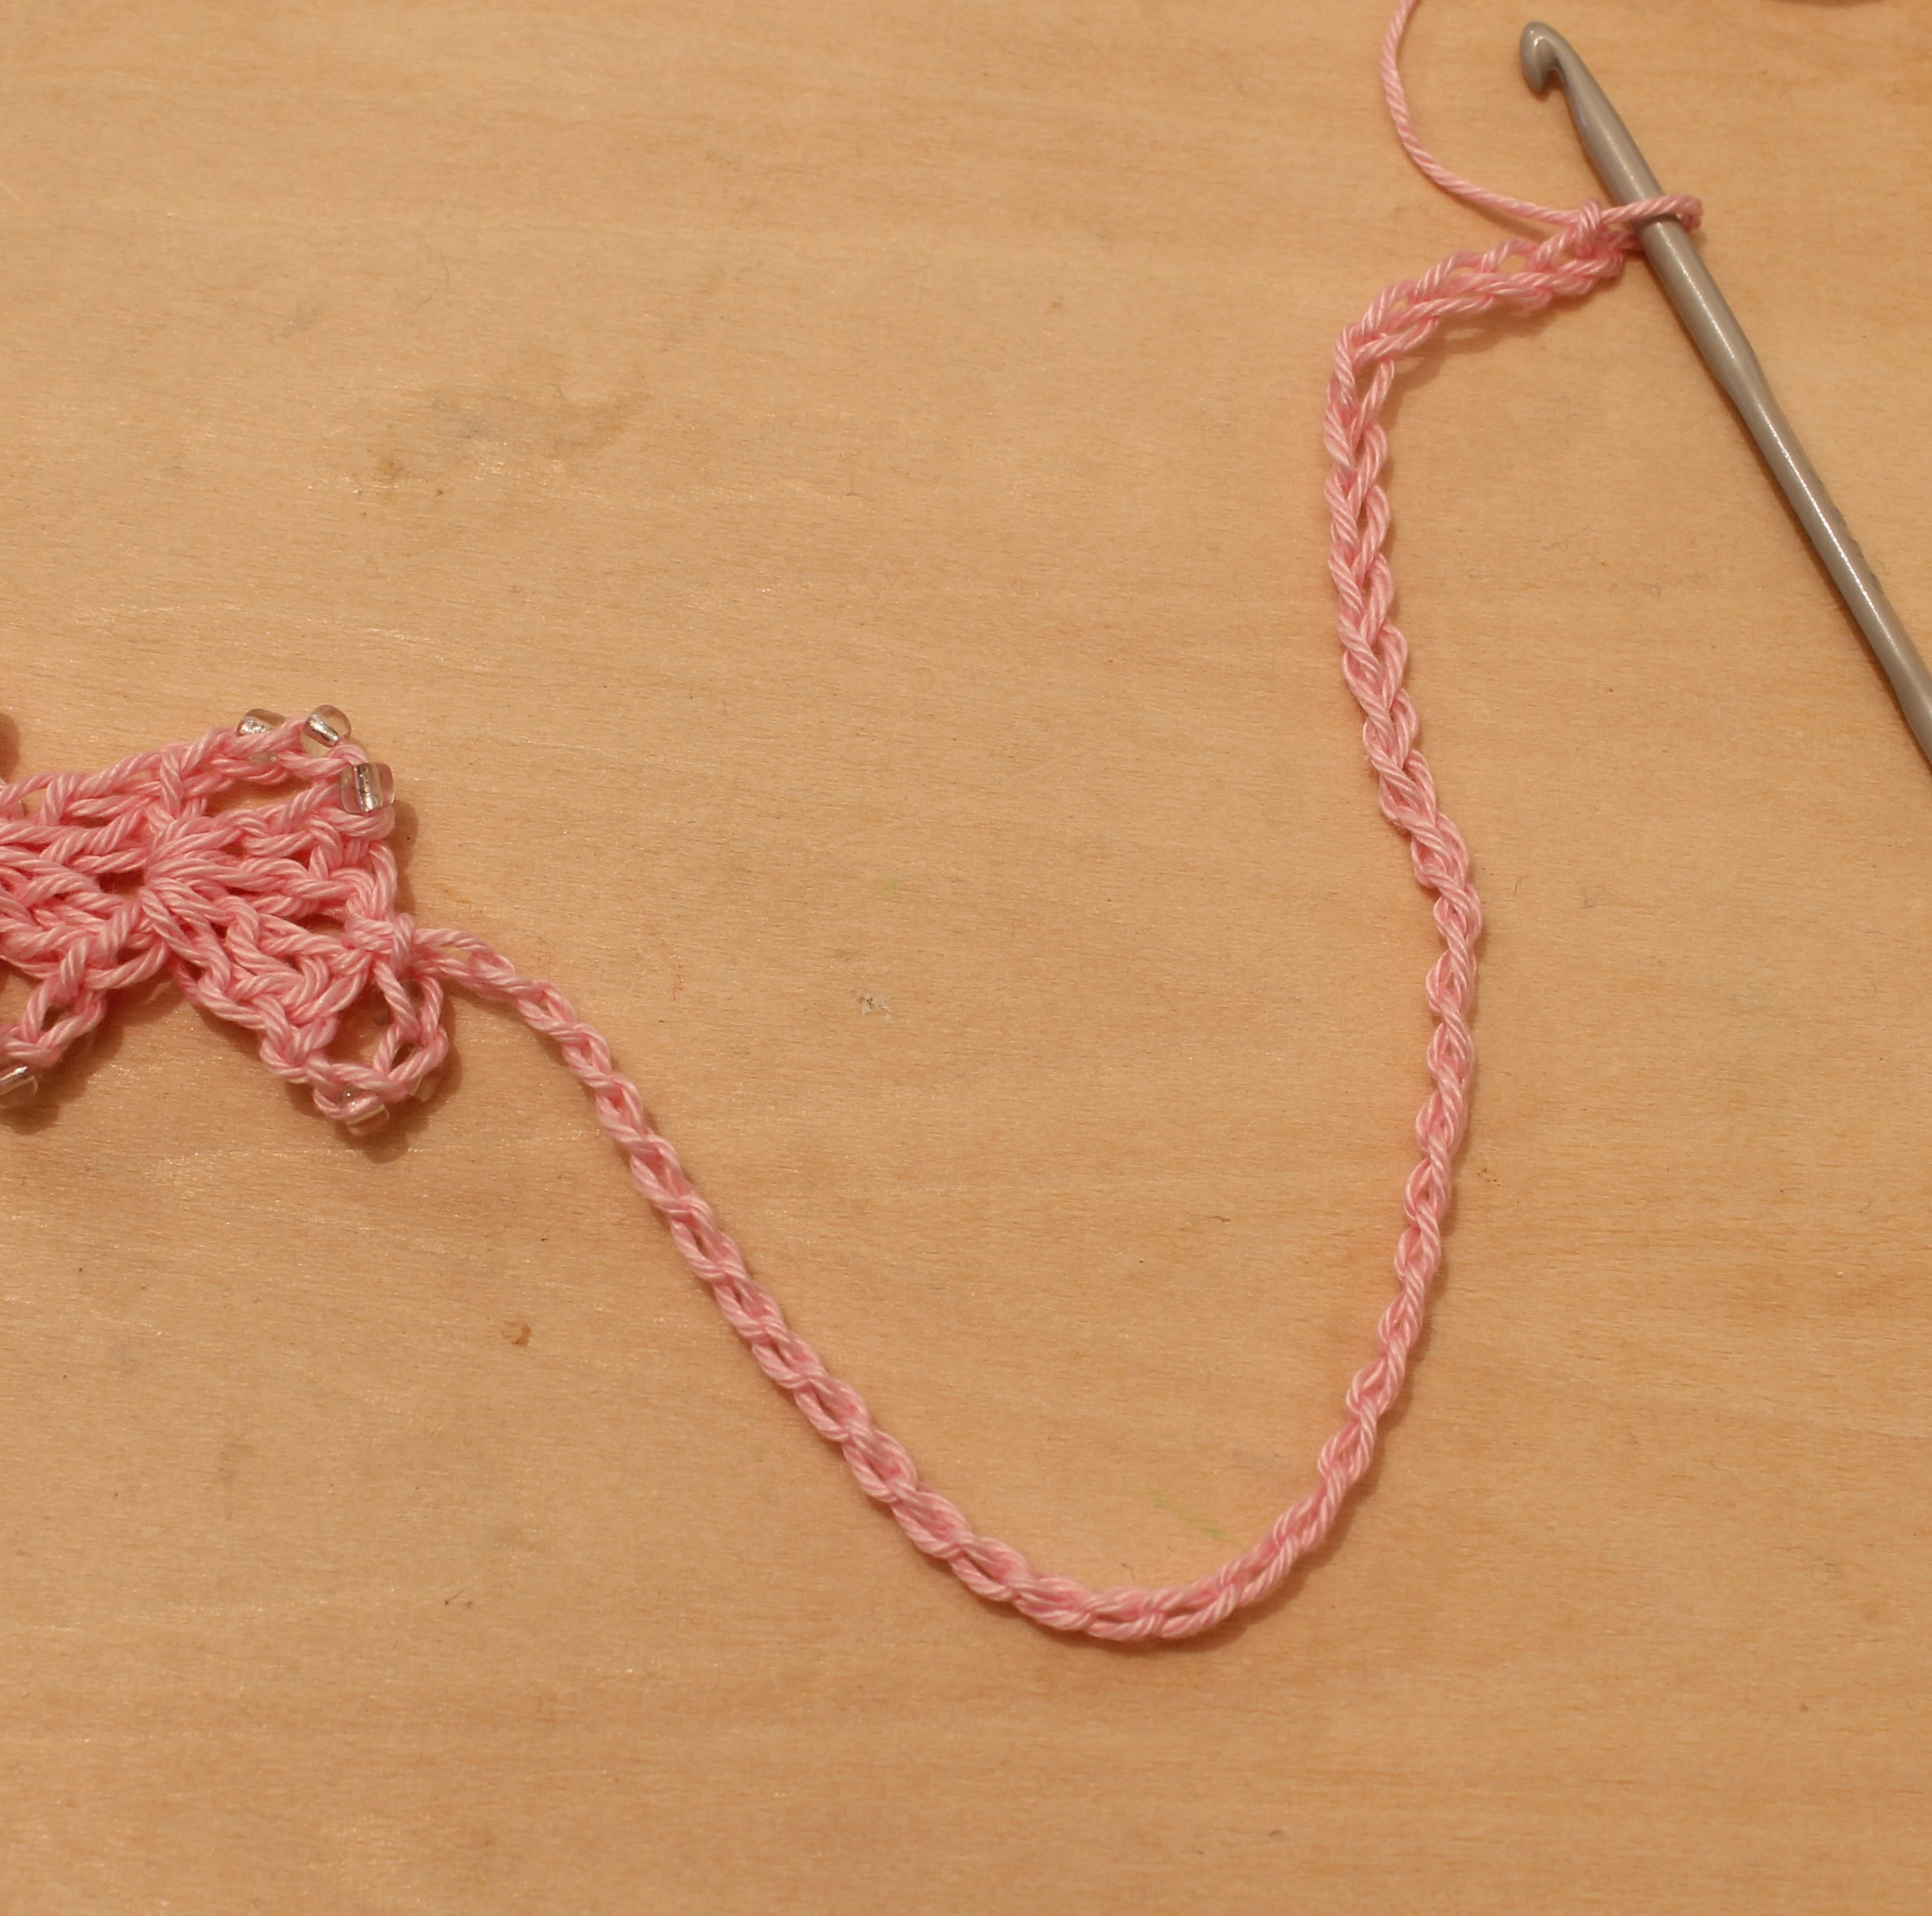
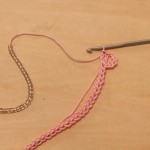
With beads now threaded, commence with a ch approximately 20 cm (8”) in length.

031

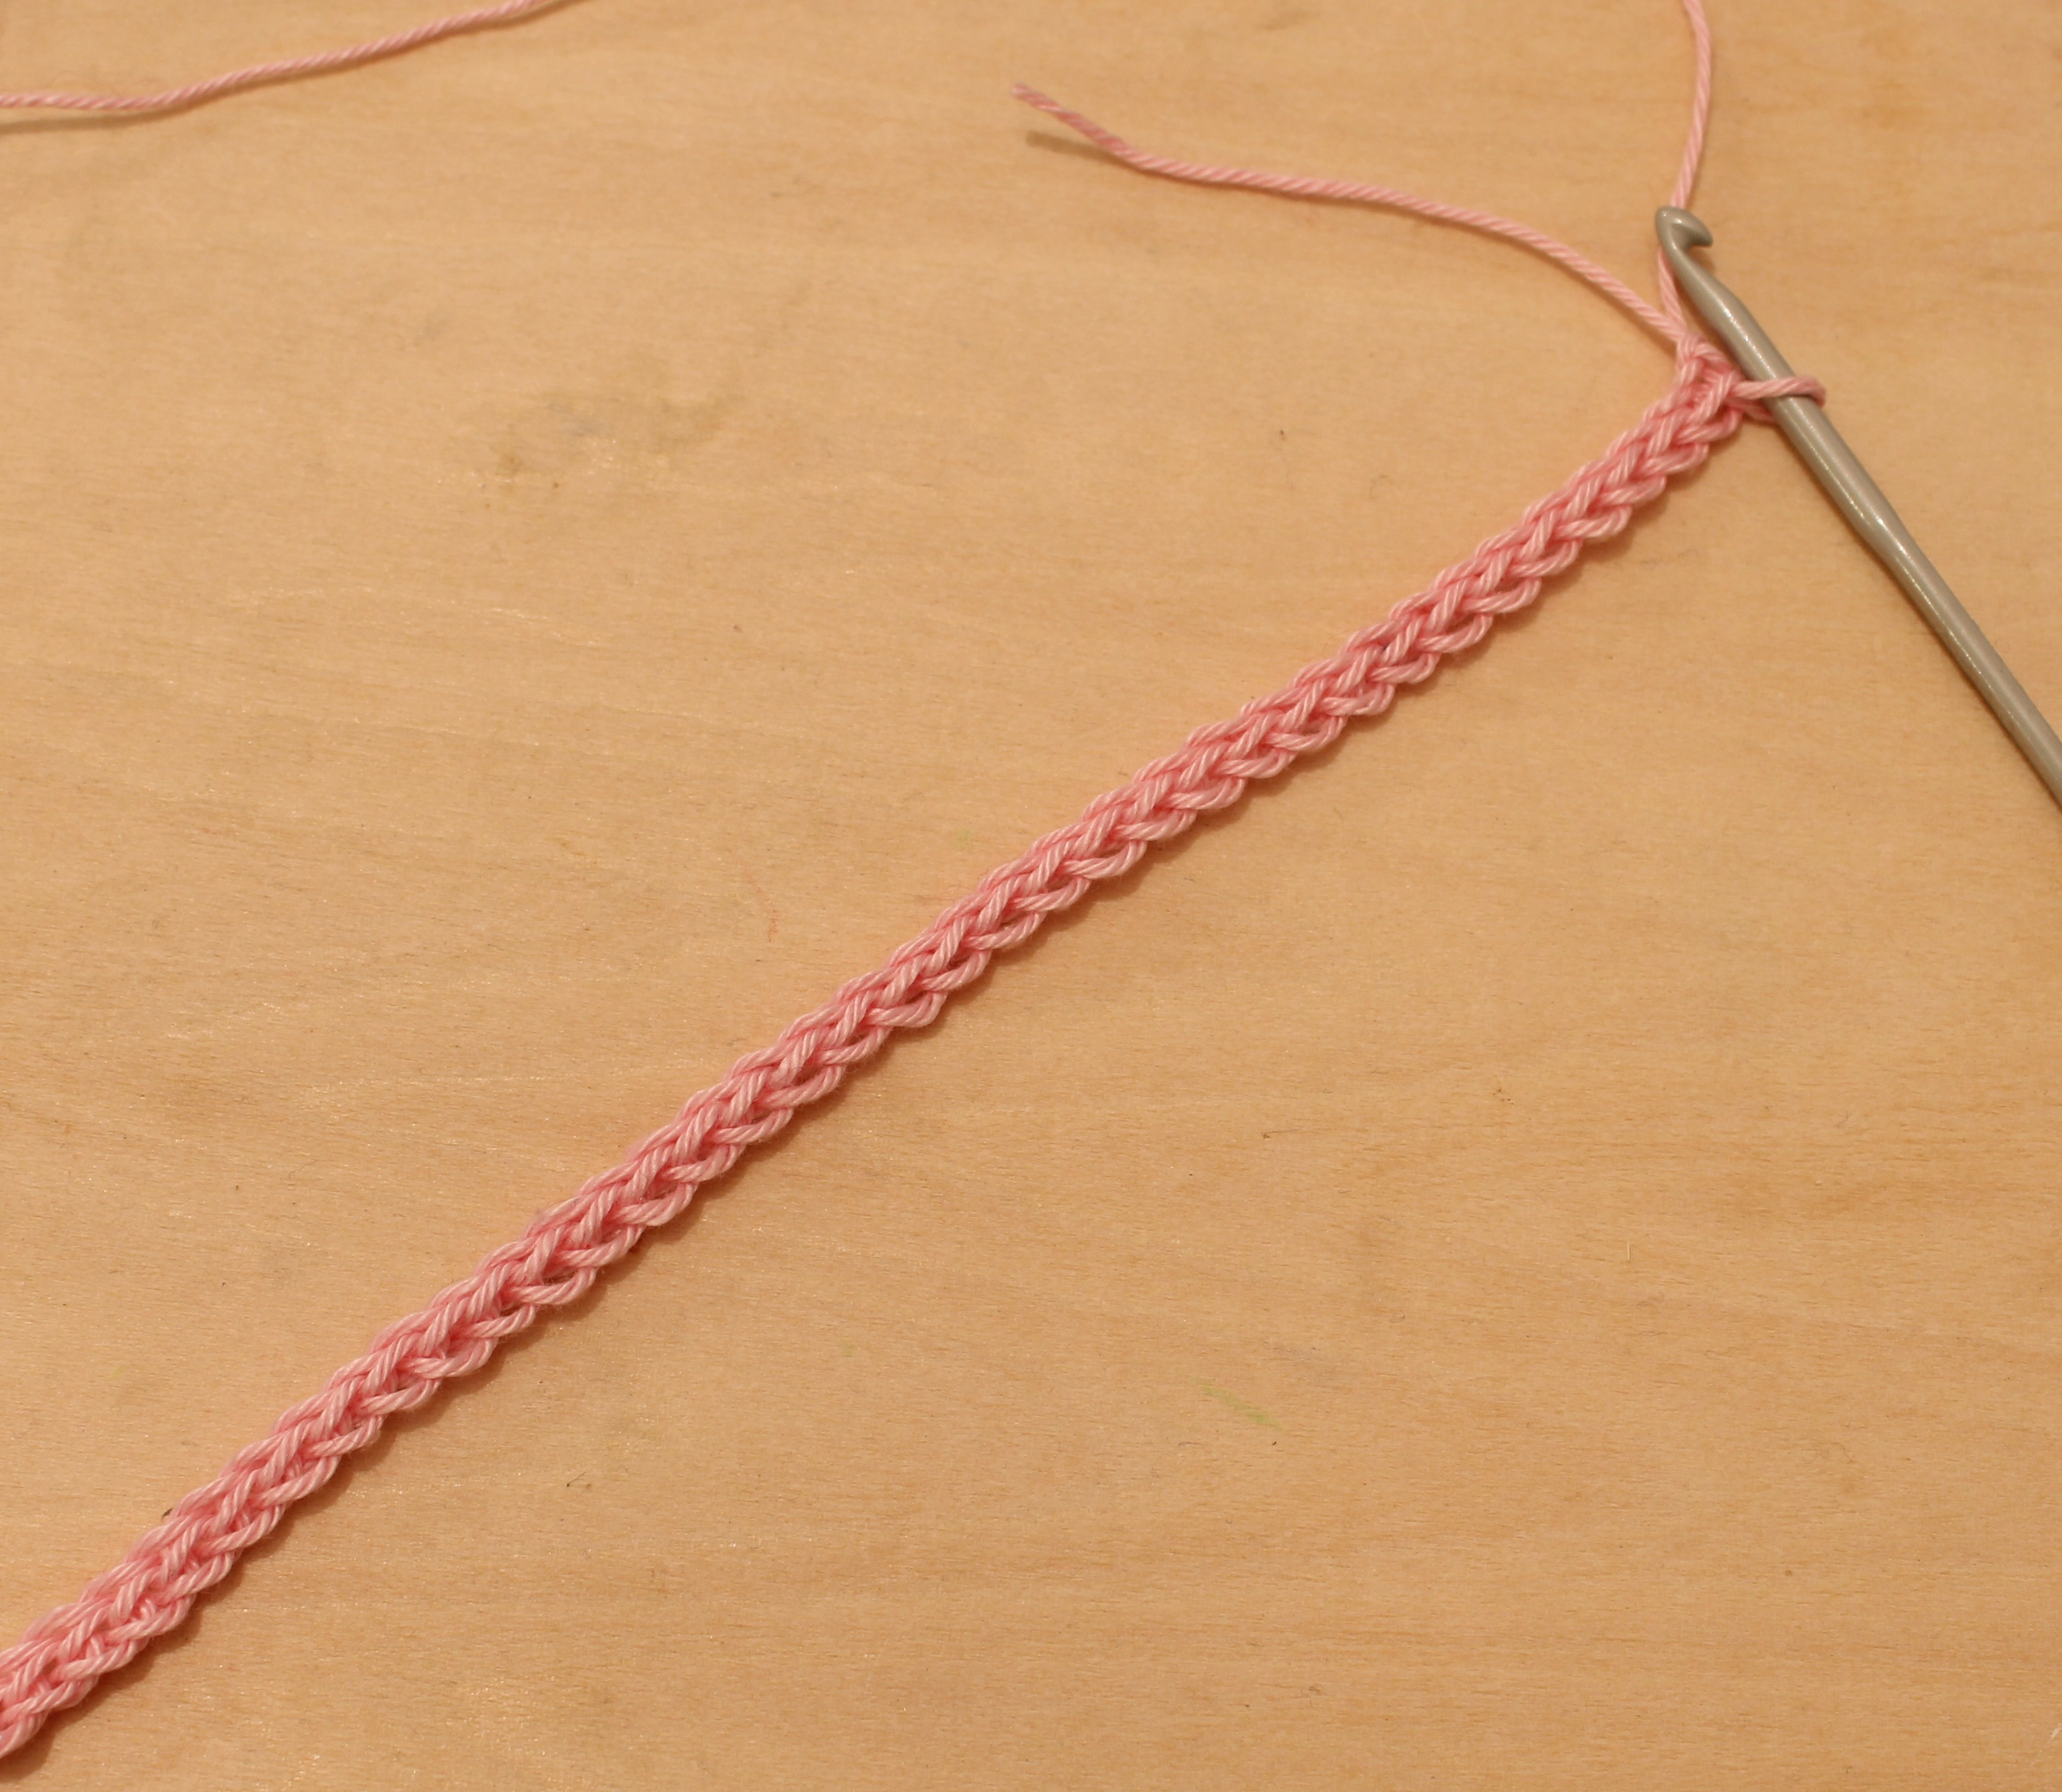
Row 1:         (Starting in 2nd ch from hook) ss in each ch to end – tie made.

032

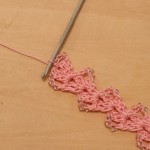
Row 2:         3ch, (1tr, 1ch, 2tr) all into end of tie,

033

turn.

034

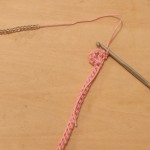
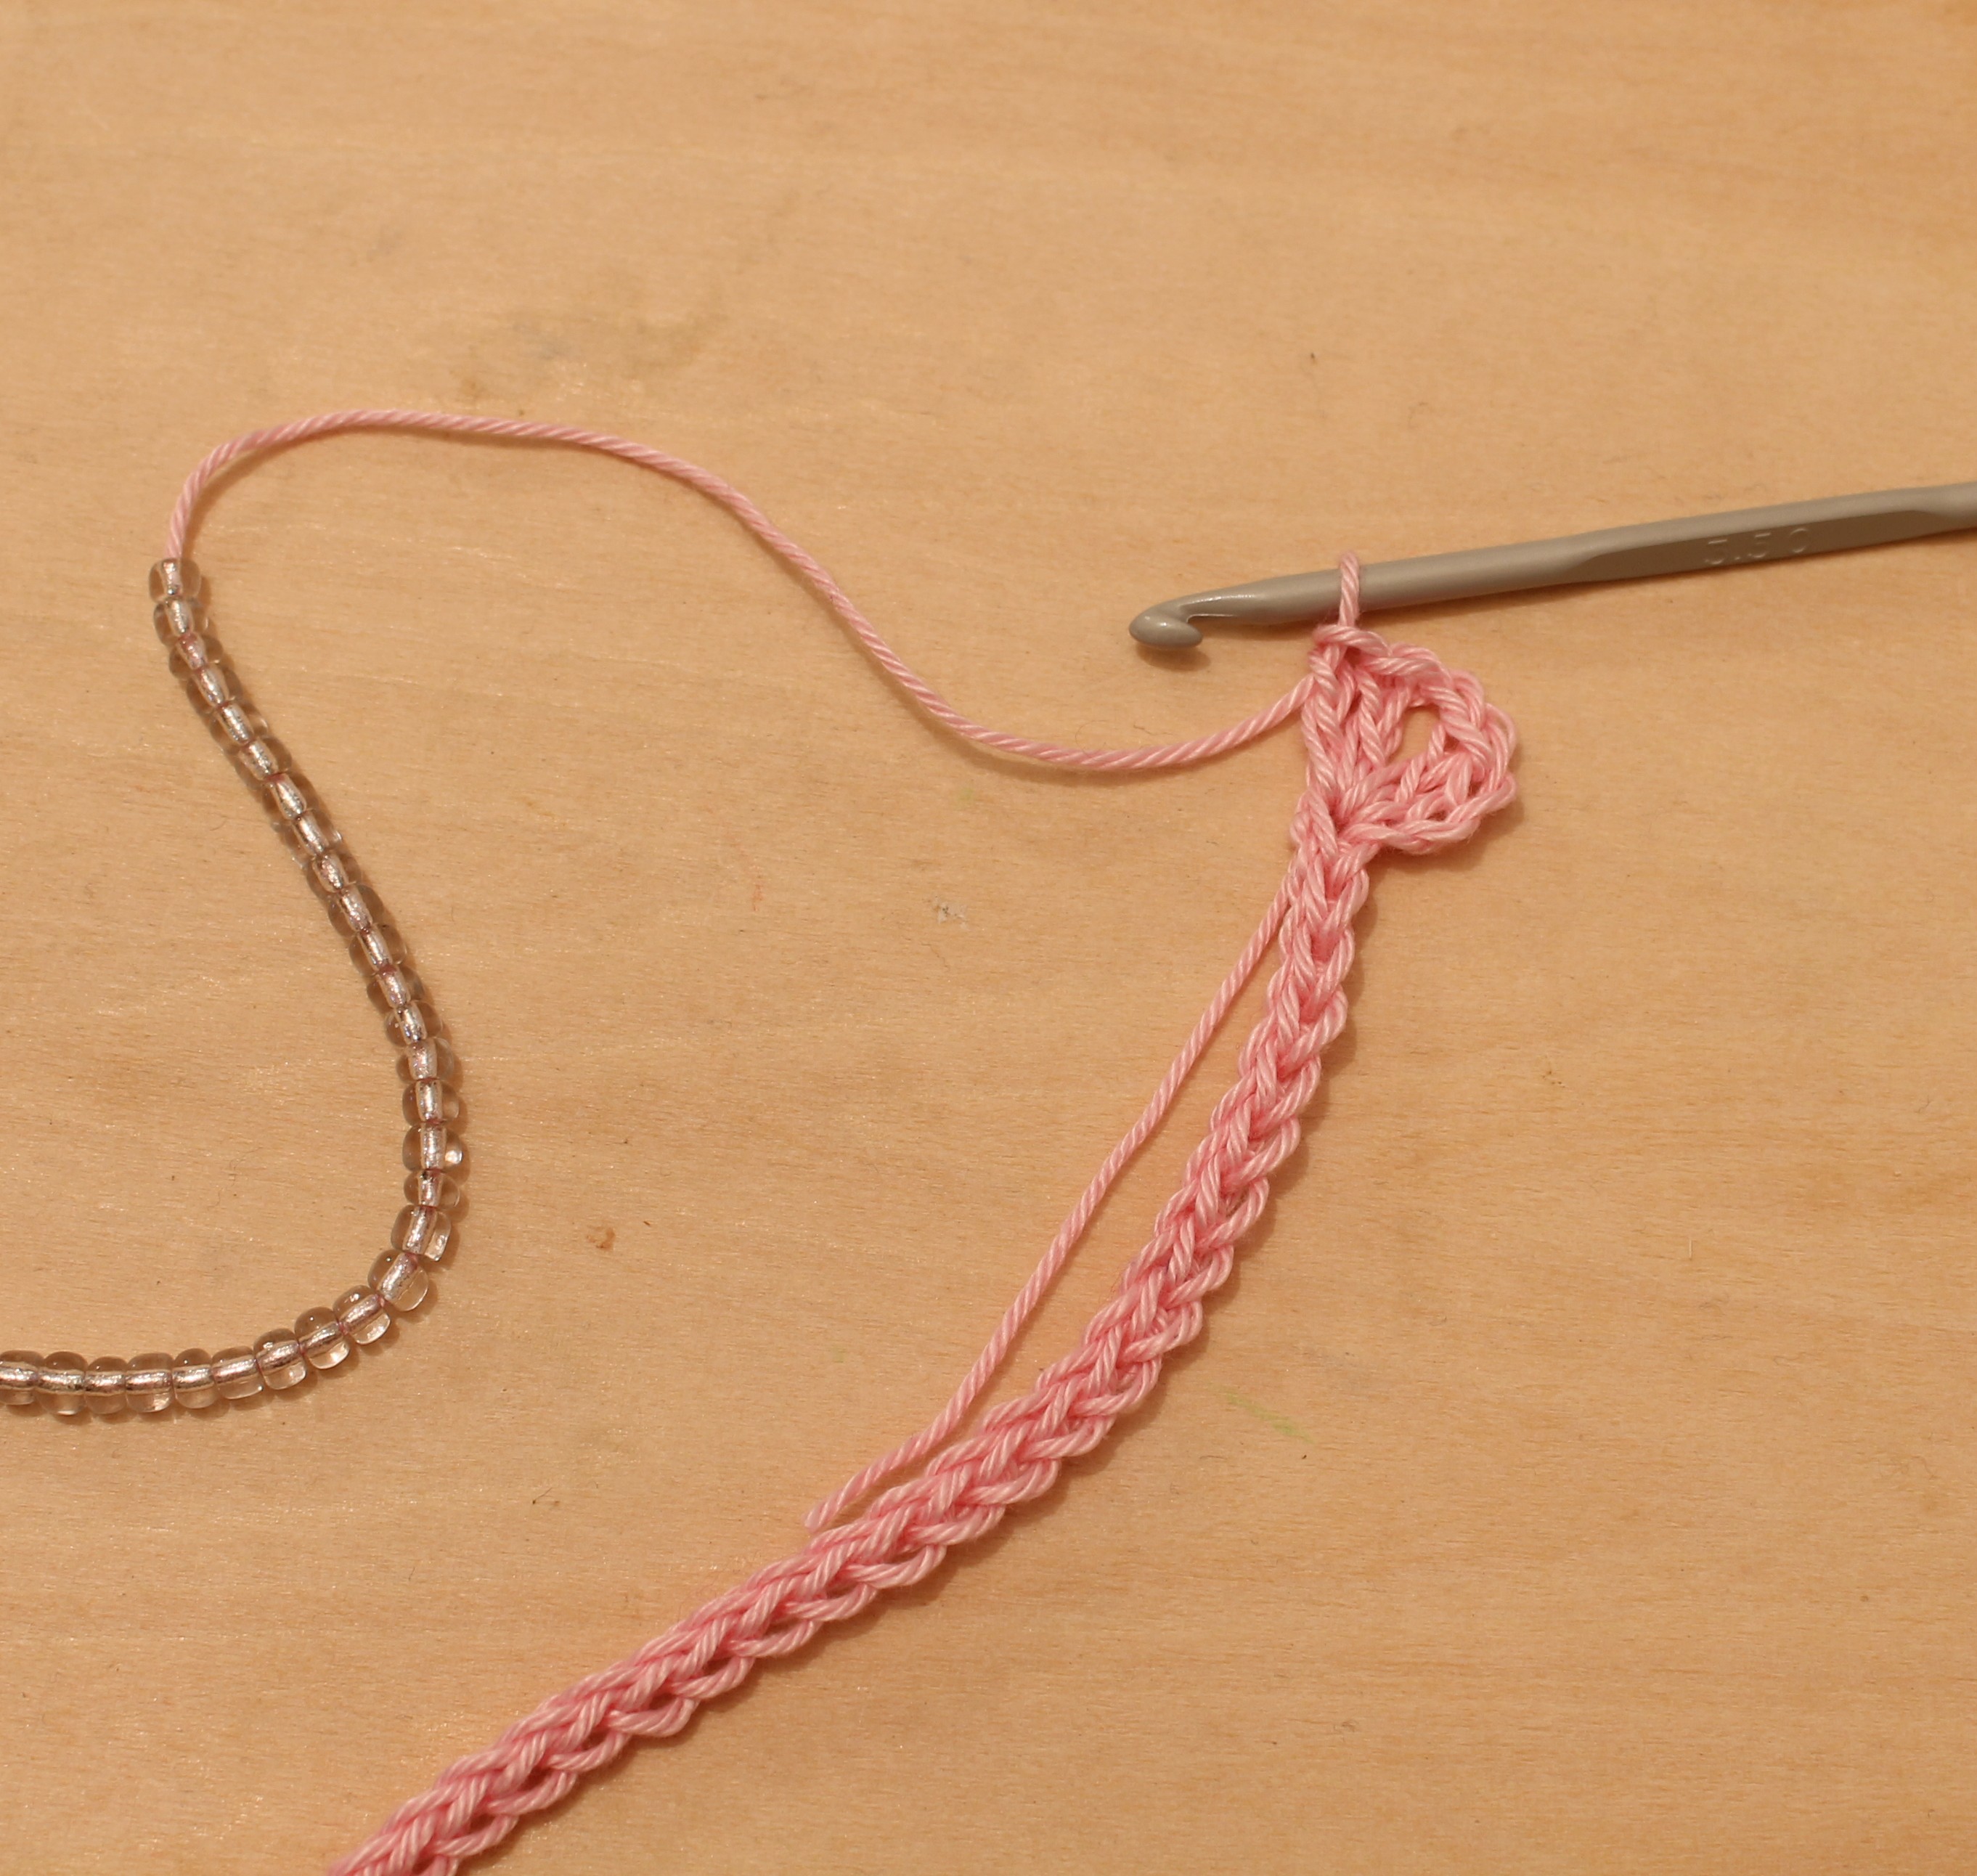
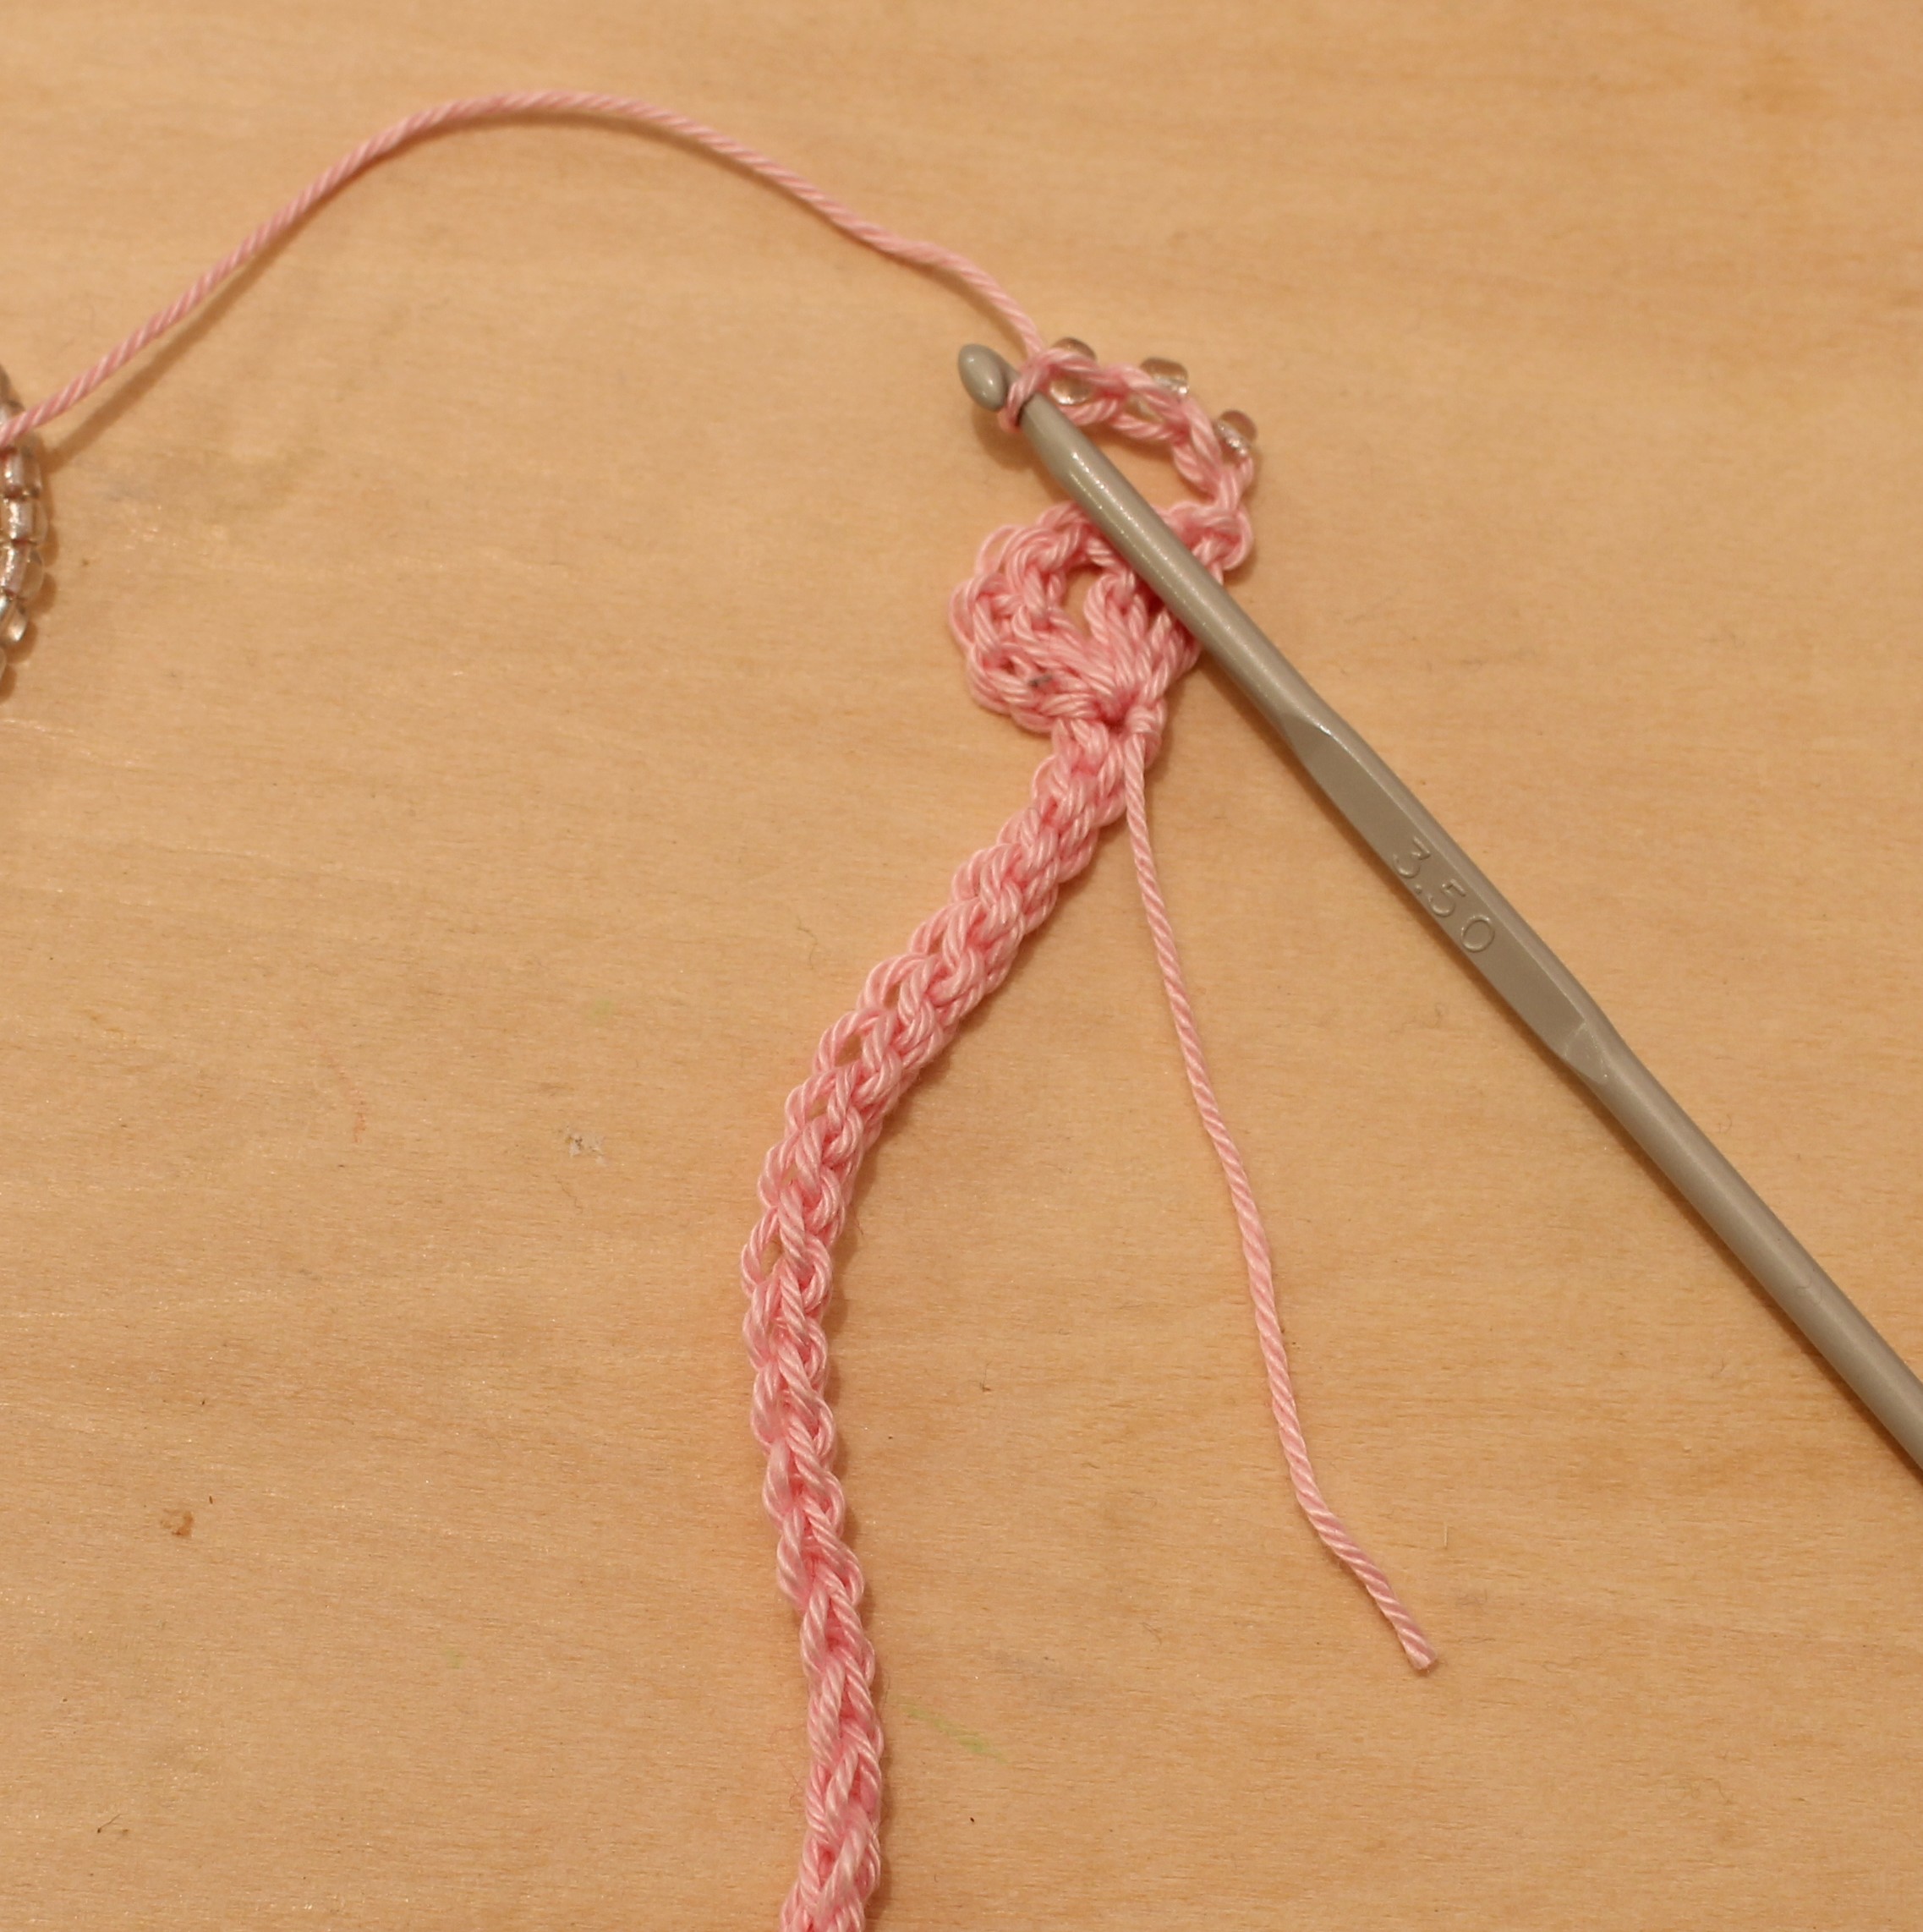
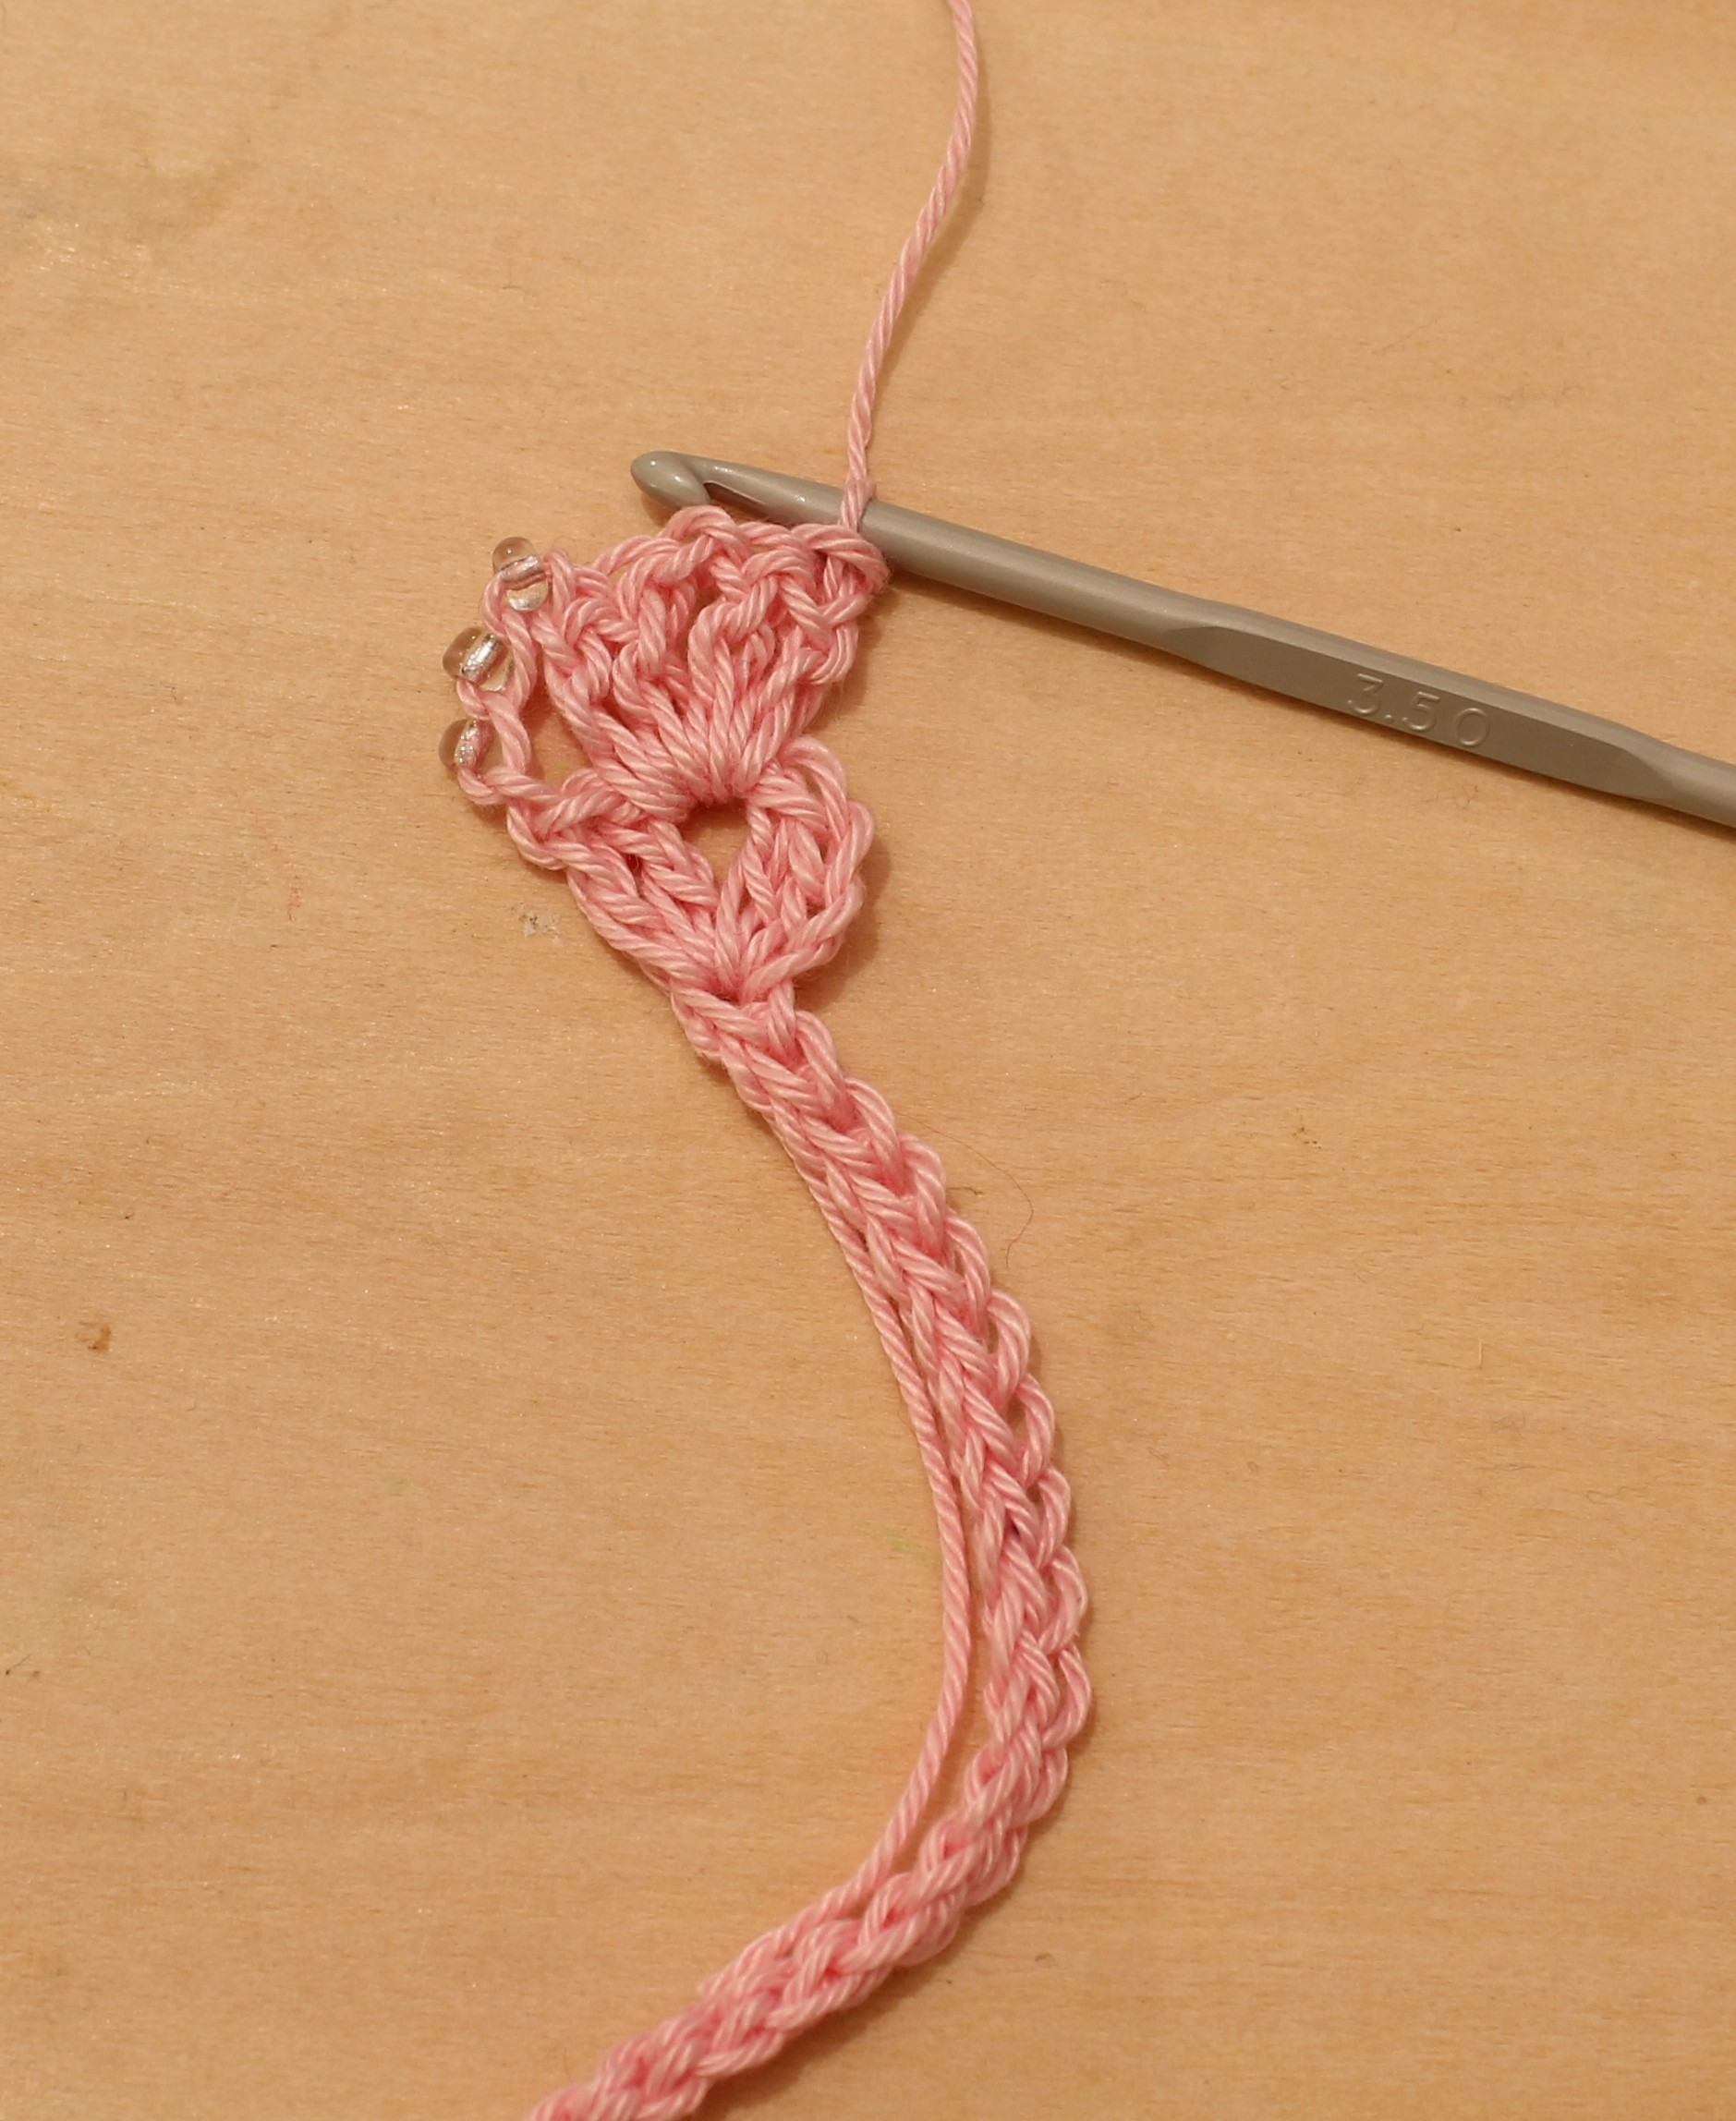
Row 3:         1ch, (bring up a bead, 1ch) 3 times,

035

(2tr, 1ch, 2tr) all into ch-1 sp,

036


turn.

037

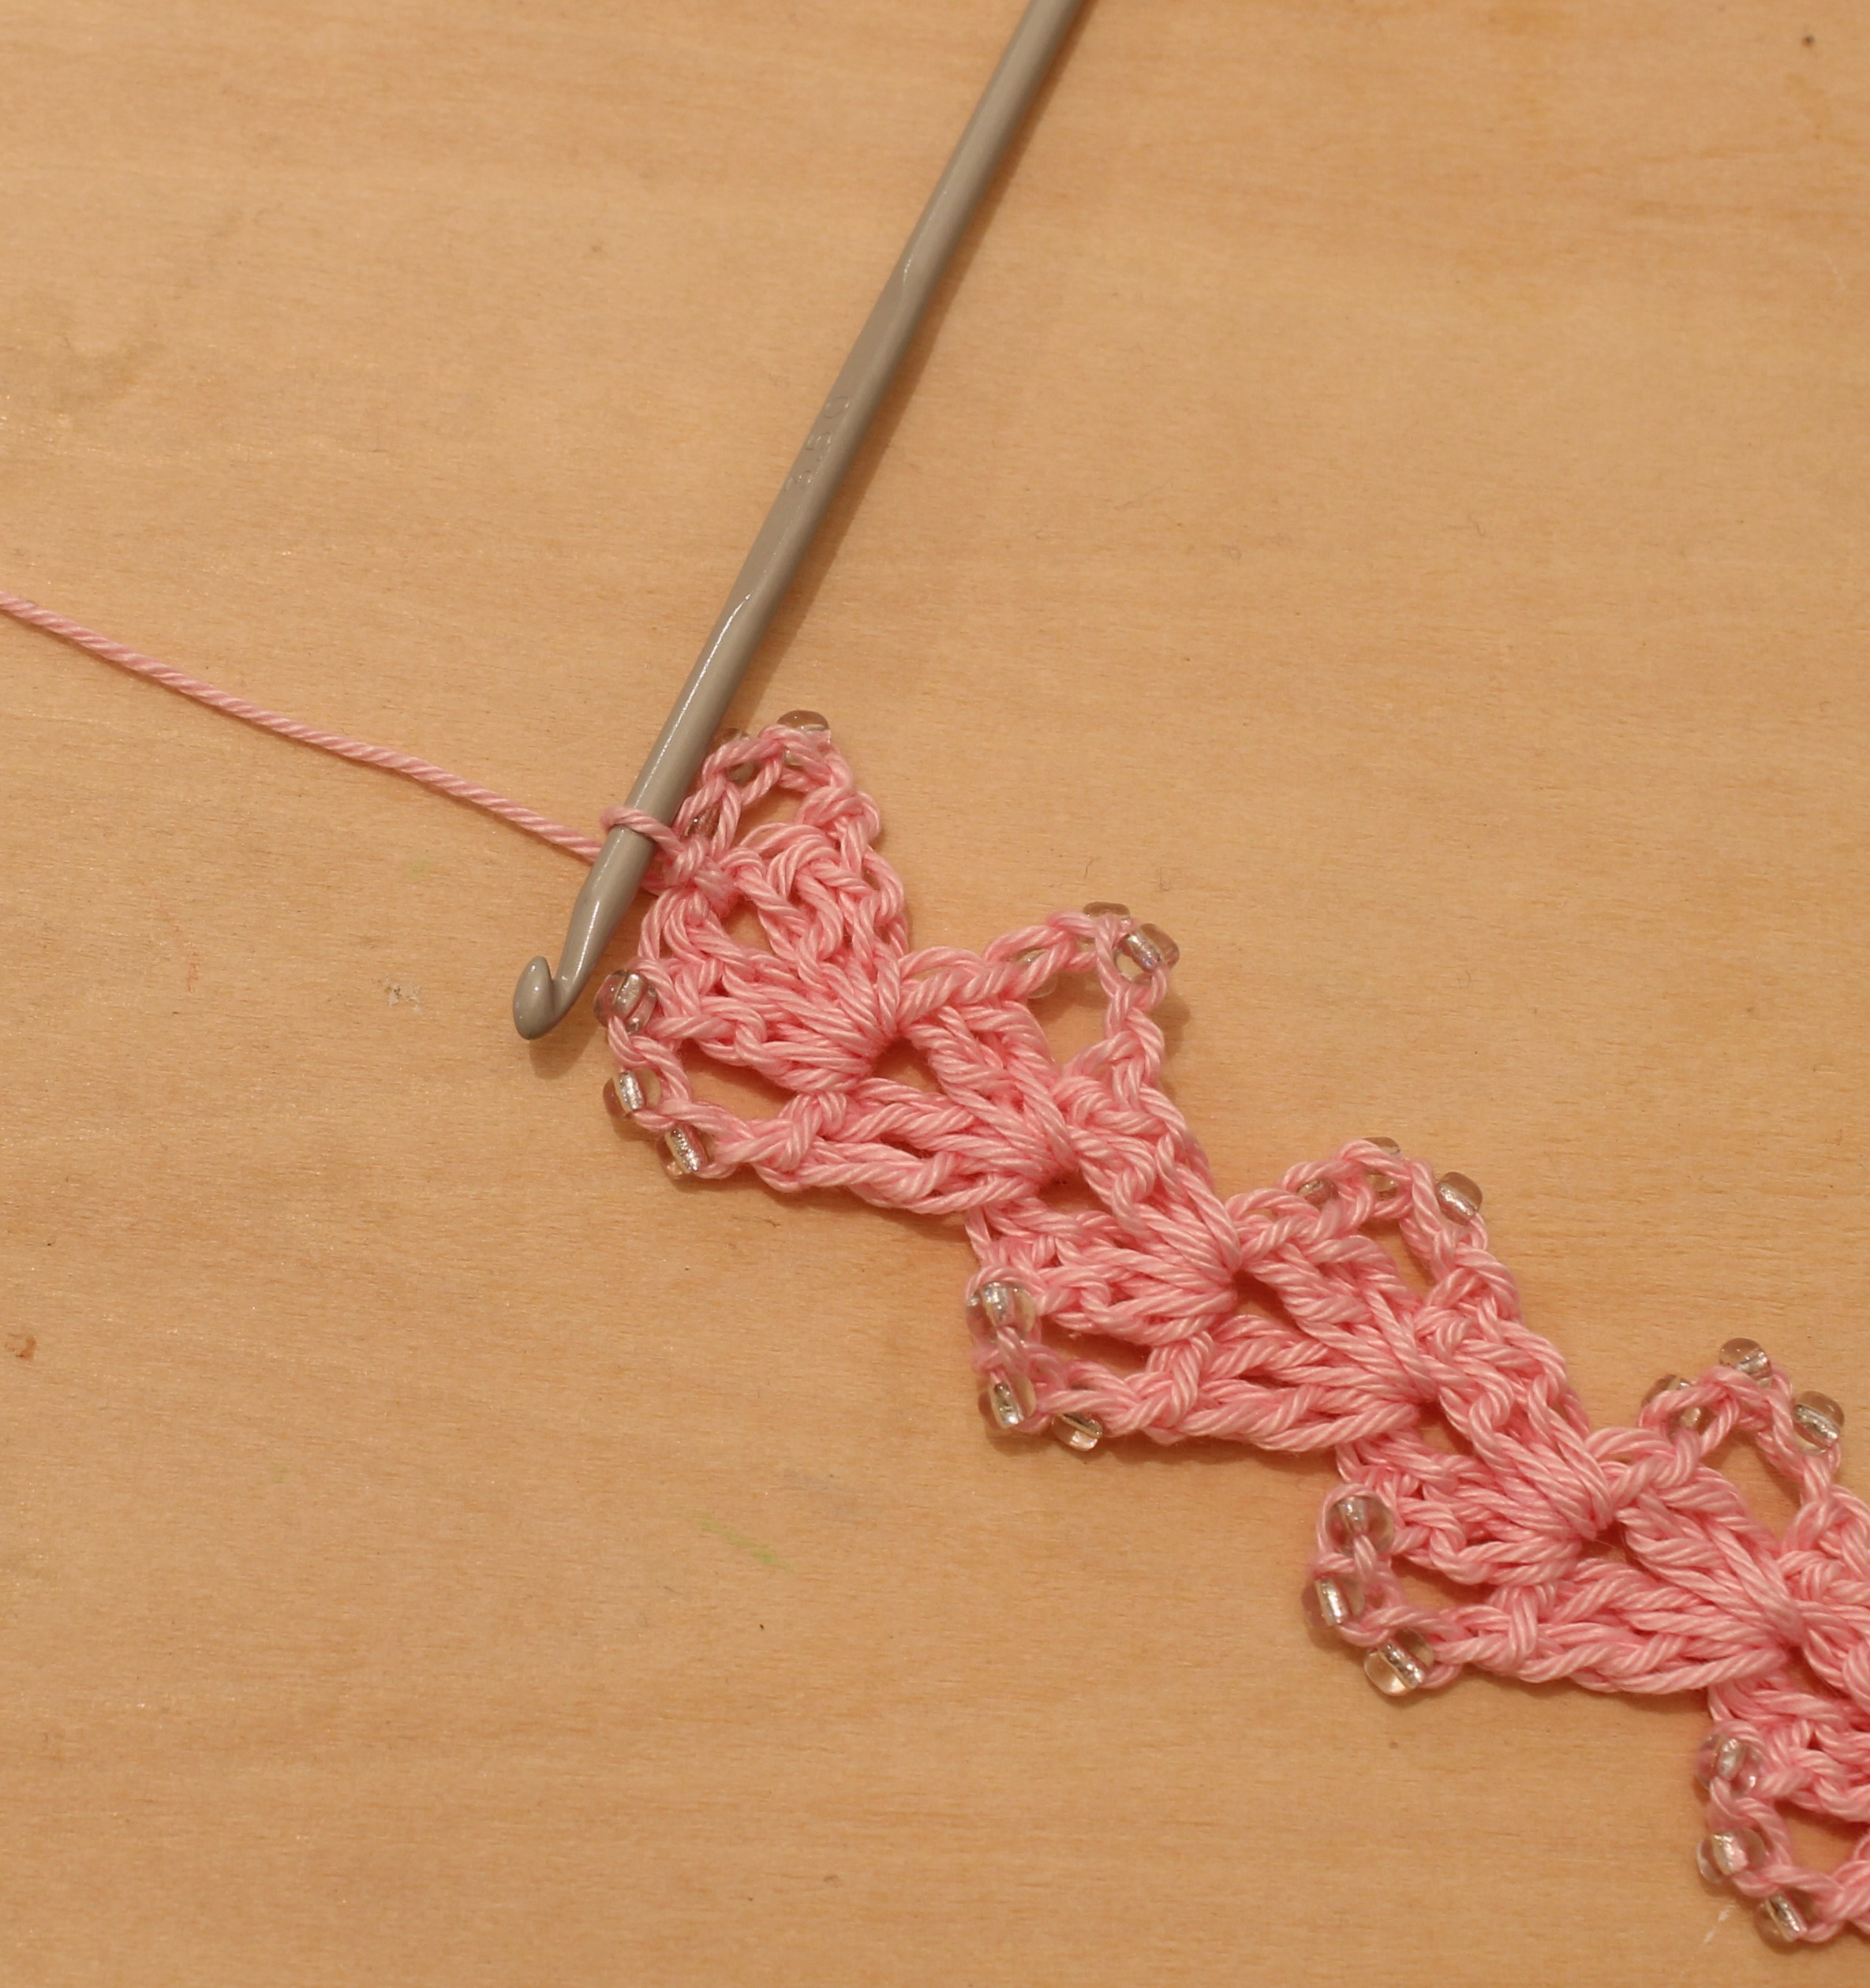
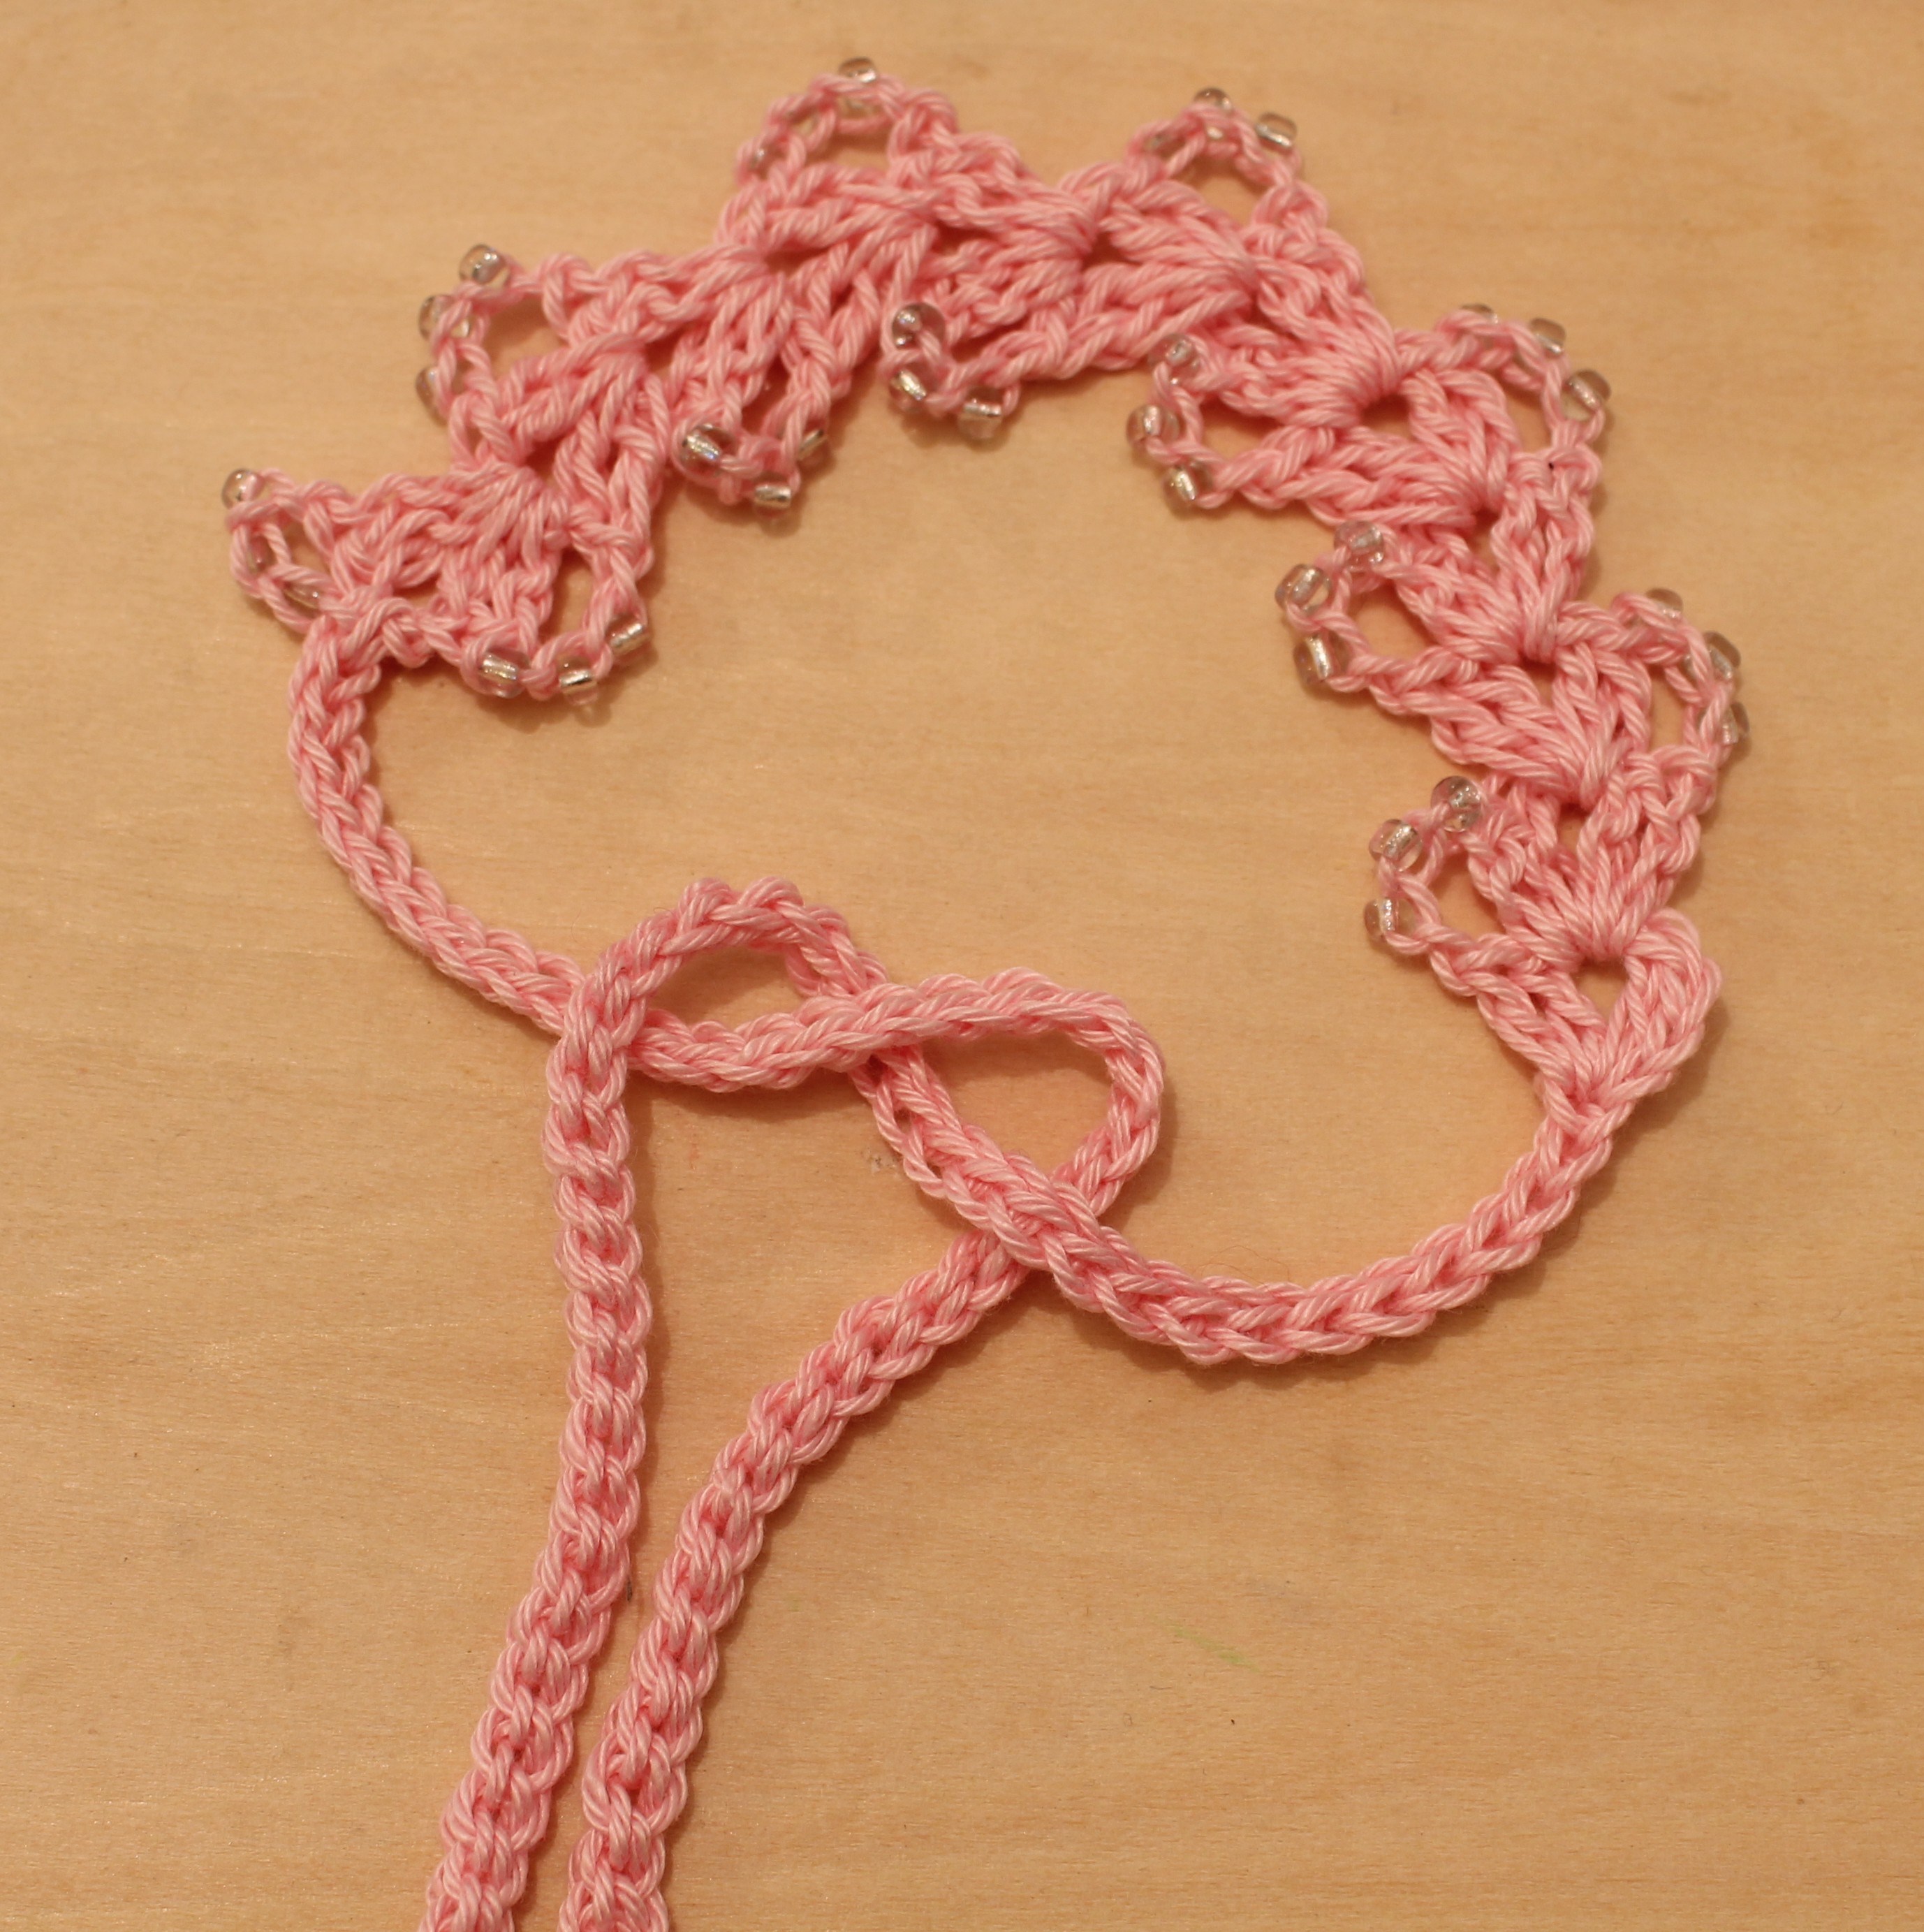
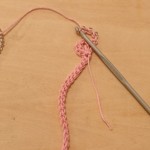
Rep Row 3 until 11 groups of 3 beads have been worked.

038

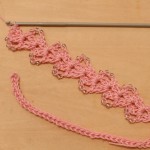
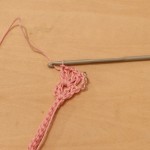
Final Row:  1ch, (bring up a bead, 1ch) 3 times, 1ch, ss in ch-1 sp,

039

make a chain approximately 20 cm (8”) in length,

040

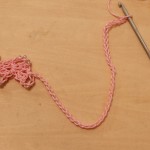
(starting in 2nd ch from hook) ss in each ch to end – second tie made, ss in ch-1 sp.

041

Fasten off, neaten ends and proceed to FLOWER (optional).
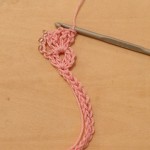
042

FLOWER
(tutorial to follow next week)

Thread 5 beads onto yarn.

With beads now threaded, commence with 5dc in a magic ring – instructional video can be found here if needed:  http://thomasinacummings.co.uk/double-loop-magic-ring/

Rnd 1:        (RS) *ss to next st, 8ch, (starting in 2nd ch from hook) ss in next ch, 1dc in next ch, 1htr in next ch, 1tr in next ch, 1htr in next ch, 1dc in next ch, ss in final ch, rep from * around – 5 petals.

Rnd 2:        (RS) ss in each st to tip of petal, bring up a bead, 1ch, ss in each st to base of petal, rep from * around, ss to base of first petal to finish.

Fasten off, leaving a 20 cm (8”) tail.

Weave tail to centre wrong side of the flower.

Carefully bring each petal to the centre, catch the underside of the tip (so that the bead isn’t hidden) and pull tightly into place.

Repeat for all 5 petals and securely stitch in place with remaining tail.

Crochet Headband with Flower

Fasten off and neaten ends.


Thomasina Cummings

January 31, 2014

I now have several free patterns on Ravelry.  You can browse them here


Crochet Spider Web for Halloween

Halloween Trim – Spider’s Web. Free Pattern

Crochet Spiders Web

The pattern is in UK terms.

The following abbreviations are used
ss = slip stitch
ch = chain
tr = treble

Using as thin a hook and yarn combination as you can, commence with 6ch, ss to first ch to make a ring.

Note:  3 of the initial  ch in each round will count as the first tr in each round.

  1. 6ch, (1tr, 3ch) 6 times into ring, ss to 3rd of 6ch to join.
  2. 8ch, (1tr in top of next tr, 5ch) 6 times, ss to 3rd of 8ch to join.
  3. 10ch, (1tr in top of next tr, 7ch) 6 times, ss to 3rd of 10ch to join.
  4. 5ch, ss in 2nd ch from hook, 9ch, (1tr in top of next st, 2ch, ss in top of same tr, 9ch) 6 times, ss to 3rd of 5ch.

Stitch into place as desired.